articles Len Metcalf articles Len Metcalf

The gentle art of critique

Giving feedback to other photographers requires effort. Before we start the learning exercises. You need to understand the power of positive feedback.

Giving feedback is hard. Receiving it is even harder for many of us, particularly me.

Read the following article I orignally wrote for Peter Eastway’s Better Photography Magazine.

When you post a photograph in the comments on any of these exercises I want you to come from a positive framework. Tell people where they are going right. There is no need to tell people what you think they could do to make the photograph more to your liking.

To follow up on this exercise, critique on someone else’s photograph in one of the exercises.

PHOTO CRITIQUES

The art of developing photographers with positive critiques and thinking

My growth as an artist relies on the attitudes and facilitation skills of my mentors and teachers. Under the careful positive guidance of some, I blossomed whereas with the negative and highly critical ones, I faltered and lost confidence.

Focus on the Positive

The most devastating time I experienced was with the drawing teachers at Sydney’s leading art school. My drawings didn’t fit the mould they wanted to put me in. Every negative comment about my work felt like bullying. I lost my confidence. My marks plummeted and I started to withdraw. Apparently, I wasn’t expressing my inner self. My tight and accurate drawings of nature didn’t fit the ‘paint on the floor’ abstract expressionist ideals of the eighties art world. My inner love for nature didn’t fit into the dominant art culture of the time. It wasn’t until I walked into an exhibition of botanical illustrators some twenty years later that I realised my drawings had a community where they could have blossomed. I stop to wonder where I may have ended up if I had found that community when I was younger.

I have now met quite a few people who didn’t fit in to their photography club, mentor or teacher moulds either. Some had even given up photography and most had left the group. It is so sad to encounter people who have lost their photographic mojo, just because of words from another photographer or worse still, an apparent expert.

Uncaring negativity has a huge toll on creatives, and it’s not just visual creatives who suffer. David Byrne, the amazing and talented lead singer of Talking Heads, says “While taking criticisms on board can be constructive, it can also be detrimental to the creative process.” Because of this, he won’t read or listen to a single critique of his performances during a season. Even his staff and family are banned from discussing what the reviewers are saying, newspapers are kept away and he uses his own judgement on quality.

Many of the people who come forth with these negative comments do it with the best intentions. They like knowing where they go wrong and assume others must be the same. However, just because you like to be told where you’re going wrong, doesn’t mean others do to.

For me, learning photography was a different matter. I was lucky enough to meet, be taught and mentored by some very positive and encouraging teachers, including Eardley Lancaster, George Schwarz and Gordon Undy. Being encouraged to photograph the things you love is a very important starting point.

Back at the ‘paint on the floor’ art school, in my photography classes I was encouraged to pursue my wilderness and nature photography that was inspired by Peter Dombrovskis and Eliot Porter. These positive teachers guided and shaped my inner direction. When I struck problems, I was encouraged to solve my way out of them rather than being shown the answer. I was given careful error correction and pointers on how to make my prints stronger. We discussed the ones that worked and analysed the outstanding ones.

Positive Encouragement

The photos that weren’t up to scratch were put aside and never talked about. The most outstanding photographs were admired, analysed and improved on. They became the target until a better one came along. In this environment, I developed quickly and blossomed. My photography took off. In nine months I went from failing art school to being acknowledged as outstanding and was awarded as the most accomplished and advanced photographer at graduation.

A key moment in my career as a facilitator was when I learned that I could teach in a positive manner. I was working with Estee Lauder at the time teaching leadership and teamwork. I was given the goal of fun instead of the usual specific learning outcomes. In one short afternoon, I learned a valuable lesson. Positive encouragement is a more powerful teacher than negative criticism. It was the first time I gave up on the error correction model I had been using for the past 10 years and trialled an encouraging approach where I kept identifying and praising the behaviours I was trying to instil in my students.

The success of this approach was life changing for me as a teacher. When you encourage and develop people’s strengths, they move away from the negatives and fill everything with the positives. The growth is amazing. My clients learned more from me in an afternoon than what was usually taking me a week to teach. Not only that, they loved it and bounced out of my session with boundless enthusiasm for what they had learned.

During the past 15 years that I have been teaching and mentoring photographers, I have found that taking an encouraging and positive approach with my students has brought endless rewards for them and me. If you can identify what it is that you love about some of their photographs, they will inevitably be out there trying to create more of them.

So, whether you are being taught, or trying to work it out for yourself, the key to your development as a photographer is working on your strengths and interests.

With feedback, it is the choice of words, and the way we deliver and structure them, that counts the most. Suggestions are much better than just telling someone what must be done. We need to flood the person in positives. Only discussing the negatives is detrimental to their growth. People need to know where they are going right.

Positive psychology is gaining momentum and is slowly being embraced in educational institutions. Having started in more esoteric roots, it is now gaining mainstream acceptance. There are many ways to include this in your photography.

First and foremost, you need to be enjoying yourself when you’re working on your photography. Time will just disappear, because you will be so engrossed in what you’re doing. Your attitude needs to be positive. Let go of work that isn’t good enough. It isn’t a mistake, it is a learning experience, a vital step in your growth. Concentrate on your good work. Figure out why it is good. Your best photographs are the ones you can enjoy looking at for a long period of time. Your outstanding photos are the ones that other people also love looking at. When someone loves your work, try and find out what it is they love about it. “Why?” is an important question to explore.

Tips for Positive Photographic Growth

Find a positive mentor

Finding a positive mentor or group is crucial. You are looking for people that are the ‘glass half full’ types, who glow with energy and support. They tell you very specifically which photographs are working and explain why. If you find yourself coming away from a meeting with someone and you feel like your work isn’t good enough then you are with the wrong people. Your mentor can be a photo friend or buddy.

Concentrate on the positives and the negatives will take care of themselves

Behavour modification experts have this down pat, as do animal trainers. When you concentrate on what you’re doing right, you will fill your memory cards with better photographs. It is better to have a list of positive things to do, rather than a list of negative things to avoid. Fill your head with what you are going to do right with your next photo shoot. A driver doesn’t concentrate on what they need to avoid, they concentrate exactly on where they are going. This is positive thinking.

Be specific with feedback and critiques

General positive and general negative comments don’t really help. The general positive ones make you feel all warm and fuzzy and the general negative ones make you feel hot and bothered. Specific positive feedback is like switching on the light. Suddenly you understand what it is that makes that photograph so fantastic, which in turn makes it easier to introduce the same benefit into your next photograph. Concentrate on error correction and techniques that improve what has already been done. Good examples of this may be suggesting a crop, or processing approaches.

Surround improvement points with specific positives

Always start on a number of specific positives and finish on even more specific positives. Personally, I always want more positives to finish on than I start with. Stop and think about what you’re going to say before you open your mouth or start typing that comment. Construct your feedback in a thoughtful and caring manner that encourages growth in the photographer.

Print your best photographs and hang them now

I always have my latest favourite photograph up on my wall. This reinforces my belief that I am a good photographer and my work is worth printing and showing people. It reminds me how good I am every time I see it and every time a visitor notices it. I make all my students create photographic products (prints, cards, calendars, books) with their work. Print it, frame it and hang it. Fill your walls with it. As soon as they do this they suddenly find extra support from their families and friends. Putting them into a book elevates their importance in everybody’s eyes. It helps reinforce your positive self-image that your photography is worthwhile; your inspiration to do more increases.

Think in positive, self-affirming thoughts

That next photograph you’re going to take is going to be fun, fantastic and fulfilling. Concentrate on what you need to do, on your feelings, listen to your inner guide. Shut out any negative thoughts and distractions.

Let go of images as soon as you’re finished

Many years of working with large format film taught me not think that I had a fantastic shot the moment I pressed the shutter. Looking through your photographs after the shoot and discovering the gems, allow yourself to be pleasantly surprised by your beautiful shots, rather than be disappointed with the ones that didn’t work. Every shot can be a learning experience. The more time you leave between taking and reviewing, the better your ability to be objective. Weeks are better than hours, and months are even better.

Photograph what you love

Photography is an outer expression of your inner self. Figuring out what you love and pursuing that subject relentlessly is a key to becoming an accomplished photographer. If you’re unsure about what you love, lay out all your favourite photographs and ask someone to show you which are your best. They are inevitably going to be the ones most about you. If you can’t figure it out, it doesn’t matter, just go with it and keep photographing more of same subject, or genre. Your best work will come from this.

Practice, practice, practice

The more photographs you create about the things you love and build on what you are already doing well, the quicker and better you will grow.

Len’s Rules for Photographic Feedback

Becoming an experienced and helpful mentor requires commitment and practice. You may even consider attending some mentoring sessions.

Good mentors are few and far between. Just because there are a lot of people listening to someone does not mean that they are good at this specific skill. We tend to listen to the loudest people or the ones who take photographs we admire.

Challenge this habit and look for someone who will bring out the best in you. Better yet, why don’t you become a mentor for someone else? You will become a better photographer from this process, because understanding why other people’s photographs work will help you understand your own practice.

Here are some guidelines on how to do it.

1. Feedback should be sought from the person, not thrust upon them.

2. If you can’t say something positive, then don’t say anything.

3. Talk about the components that work for you and why.

4. Be specific – the more specific you are, the better.

5. Use a ‘positive-improvements-positive’ structure.

6. Offer error correction by showing, or suggesting, how to modify.

7. Just because you like to hear what you did wrong, doesn’t mean others want to hear that too. If you’re stuck in this paradigm, try to get out of it. Your photography will improve quicker than it is now.

8. Be humble and sincere.

9. Encourage the photographer to do more.

10. Avoid personal attacks on the person at all costs.

As the receiver of feedback, if you find yourself justifying what you’ve done, then you’re not listening to the person.

At the end of the day, it is your photograph, you can love it as much as you like and you can leave their comments behind you. The key is to listen, not argue, or justify.

If you’re the one being asked to provide feedback, try these steps:

1. Look

2. Interpret

3. Technical points

4. Artistic points

5. Improvements

6. Good points

Read More
articles Len Metcalf articles Len Metcalf

Giving your work time to mature

Len muses of his latest photographic discovery when looking back through his work from a year ago. He then discusses how he uses time to help decide which are the masterpieces.

Mist in the Tarkine Wilderness - The Donaldson River, Corrina, The Tarkine. Copyright © Len Metcalf 2017

I have just found this photograph. Well a couple of days ago I rediscovered it, and today I realised how much I really loved it. That was looking at it on the phone. On the full screen of my computer, I am not so sure. So today I will print it out and pin it up on the wall to stare at for a while, to see if it really passes the test of time. 

Time seems to answer many questions and solves a lot of problems. Yes, it is true that it doesn't solve all of the worlds and humanities problems, otherwise we would be happily living in utopia. But it does seem to solve creativity problems, it does help decide on if an artwork is resolved. It allows your minds to mature on an idea and on your photographs.

I have read recently that giving your images time to breathe, to mature and grow is bullshit. They cited reasons and talked about Garry Winogrand. How terrible it was that he didn't see all of his work. It seemed to play down on his obvious genius. Criticised his demeanour. It was actually very disappointing to read.  I am surprised how dogmatic some photographers and writers on photography can be. I suppose they think it brings them clicks, or perhaps they are just like that as people. Who are you to tell someone what is right or wrong?  Isn't better to just describe what you do and express your opinions as opinions. Nothing more. To urge people to experiment visually and with their thinking is to be celebrated.

To tell others what to do should be condoned. Is much like the photoshop argument, which I hate, we argue where the line of post-processing ends and manipulation begins. For me, it starts when I start to imagine the photograph. The manipulation grows as I use my camera, actively changing how the photograph is going to look. I stop with burning and dodging, and a bit of spot removal. That is because I love the taking photographs. I dislike (hate and despise even) my time at the computer. I don't think I have used Photoshop for the past ten years. I stop the post-production manipulation at a point that suits me. Who am I to tell you when to stop using photoshop. You should stop at the point where you find yourself with a resolved photograph or one you feel you need to abandon. Process as much as you love to do.

When I write that time is the answer to many questions, that is just my opinion. You don't have to follow my advice. I am actually just suggesting that you go back and revisit your work, and spend time with it. So with this in mind lets revisit the included image. 

On first viewing, I would have discounted it because the branch in the upper right-hand corner is disappointingly soft. I tell people, sharpness is an illusion, and that sharpness like many things photographic depends on size.  So I won't really know if it is sharp enough until I print it out at my favourite size.   My eye scans the edges of the photograph. I am looking for distractions. There are some, but the question is are they too much or not. I could darken the vignette, but that would change the natural one. I could clone it out, but I don't like doing that. I could burn it down a bit. But I intuitively think it doesn't need it. Again, on my computer where the photograph is larger than the printed size, I can't really tell. So yet again I come back to the same answer. Print it out Len, have a look at it. And see how you feel about it over time. 

So I print it out. Look. I stare. I analyse with my logic. I listen to my feelings. I judge. 

It looks good, the branch is marginally soft, but not obviously so at normal viewing distance. The tree in the lower corner isn't the distraction I imagined. So as an act of finishing it, I number it #1. I title it, "The Donaldson River, The Tarkine". I sign it. I emboss it with my studio's stamp and the business logo.

I take it to my bedroom and blue tac it to my grandfather's wardrobe. Yes, that is also special to me, for he made it well before I was born.  Now I can really live with it. Actually, if all of my picture frames weren't in an exhibition I think this one is worthy of a frame.

But the frame needs to wait. The next few months of looking at it will seal its fate. Will it get ripped up. Will it get thrown in the box of old prints? Will it get a frame? Will it get exhibited? Right now I don't know. But one day the answer will just arrive.

The real moral of this article, the one that I started with in my mind, is the same one I have been telling people for ages. Give your work time. 

So here are some things I do:

  • I only have one rating system. Five stars for outstanding work. That is it. I don't use four stars or any less. It is the flagging system that is built into Lightroom. But I don't like to give a photography a flag, I prefer to give it five stars. A little bit of positive psychology just for myself. When I go through my lifelong digital catalogue on Lightroom there is just over 9,000 five star photographs. The reality is that most of them probably don't deserve that rating. But by doing so I get to revisit ones that I thought had merit sometime in the past.

  • I often let my photographs sit on my camera for some time before I download them. So last week I did a shoot with a model in lingerie, the first one in what seemed like years. I waited a few days before looking at them. So I could forget what I was trying to achieve when I took them. Forget the look I was going for. This is because I didn't want to judge them on striving for that look. If it I don't succeed I will often discount the photograph rather than judge it purely on its artistic merit.

  • I regularly revisit shoots from a year ago, and even longer. I pick a full trip. Say, all of my Tarkine photographs. I then go through all of the images again. I take my time, I savour them. I assess and judge them again, without the memory of taking them. Well, usually I can't remember. Some photographs are just so memorable I can't let them go. Do you know that every time I do this I usually find a better photograph than all of the ones I have previously given five stars too? That is what I am doing I am looking for the hidden gems. The ones I glossed over. The ones I judged as failures. My taste may have changed, my memory might have faded, my emotions will have shifted. Search for the gems, and the masterpieces. They are there hidden amongst your previous work.

  • I live with my work that I think is going to be amazing. I show people these photographs. I will put them on the web, present them in camera club talks, I will put them into my workshops. This is so I keep seeing them. It gives me time to live with them. Slowly my feelings change, either they grow or slowly they fade.

  • I print my work. I pin it to the walls. I blue-tac them to the cupboards. I use a magnet and put them on the fridge. I try to do this at the finished size, but I often do small little prints. I own a little Canon Zelphie printer, it only does 4 x 6 inch prints. It gives me a working proof that is great. If it is going to be an exhibition print, I print it off at A3 and live with it at that size too. Sometimes I even frame them and put them on the wall. There have been times when I have taken the frame down, removed the print and ripped it up.

  • Really look at your photographs. I mean stare at them. Not for a minute or two. But for much longer. Ten minutes. Twenty? An hour! Over a month. A year. Allow your mind to drift. Notice your feelings. Analise your work. Really get to know it. Work out what works for you.

Read More
articles Len Metcalf articles Len Metcalf

Locations and possibilities

Do you chase known locations or photographs?
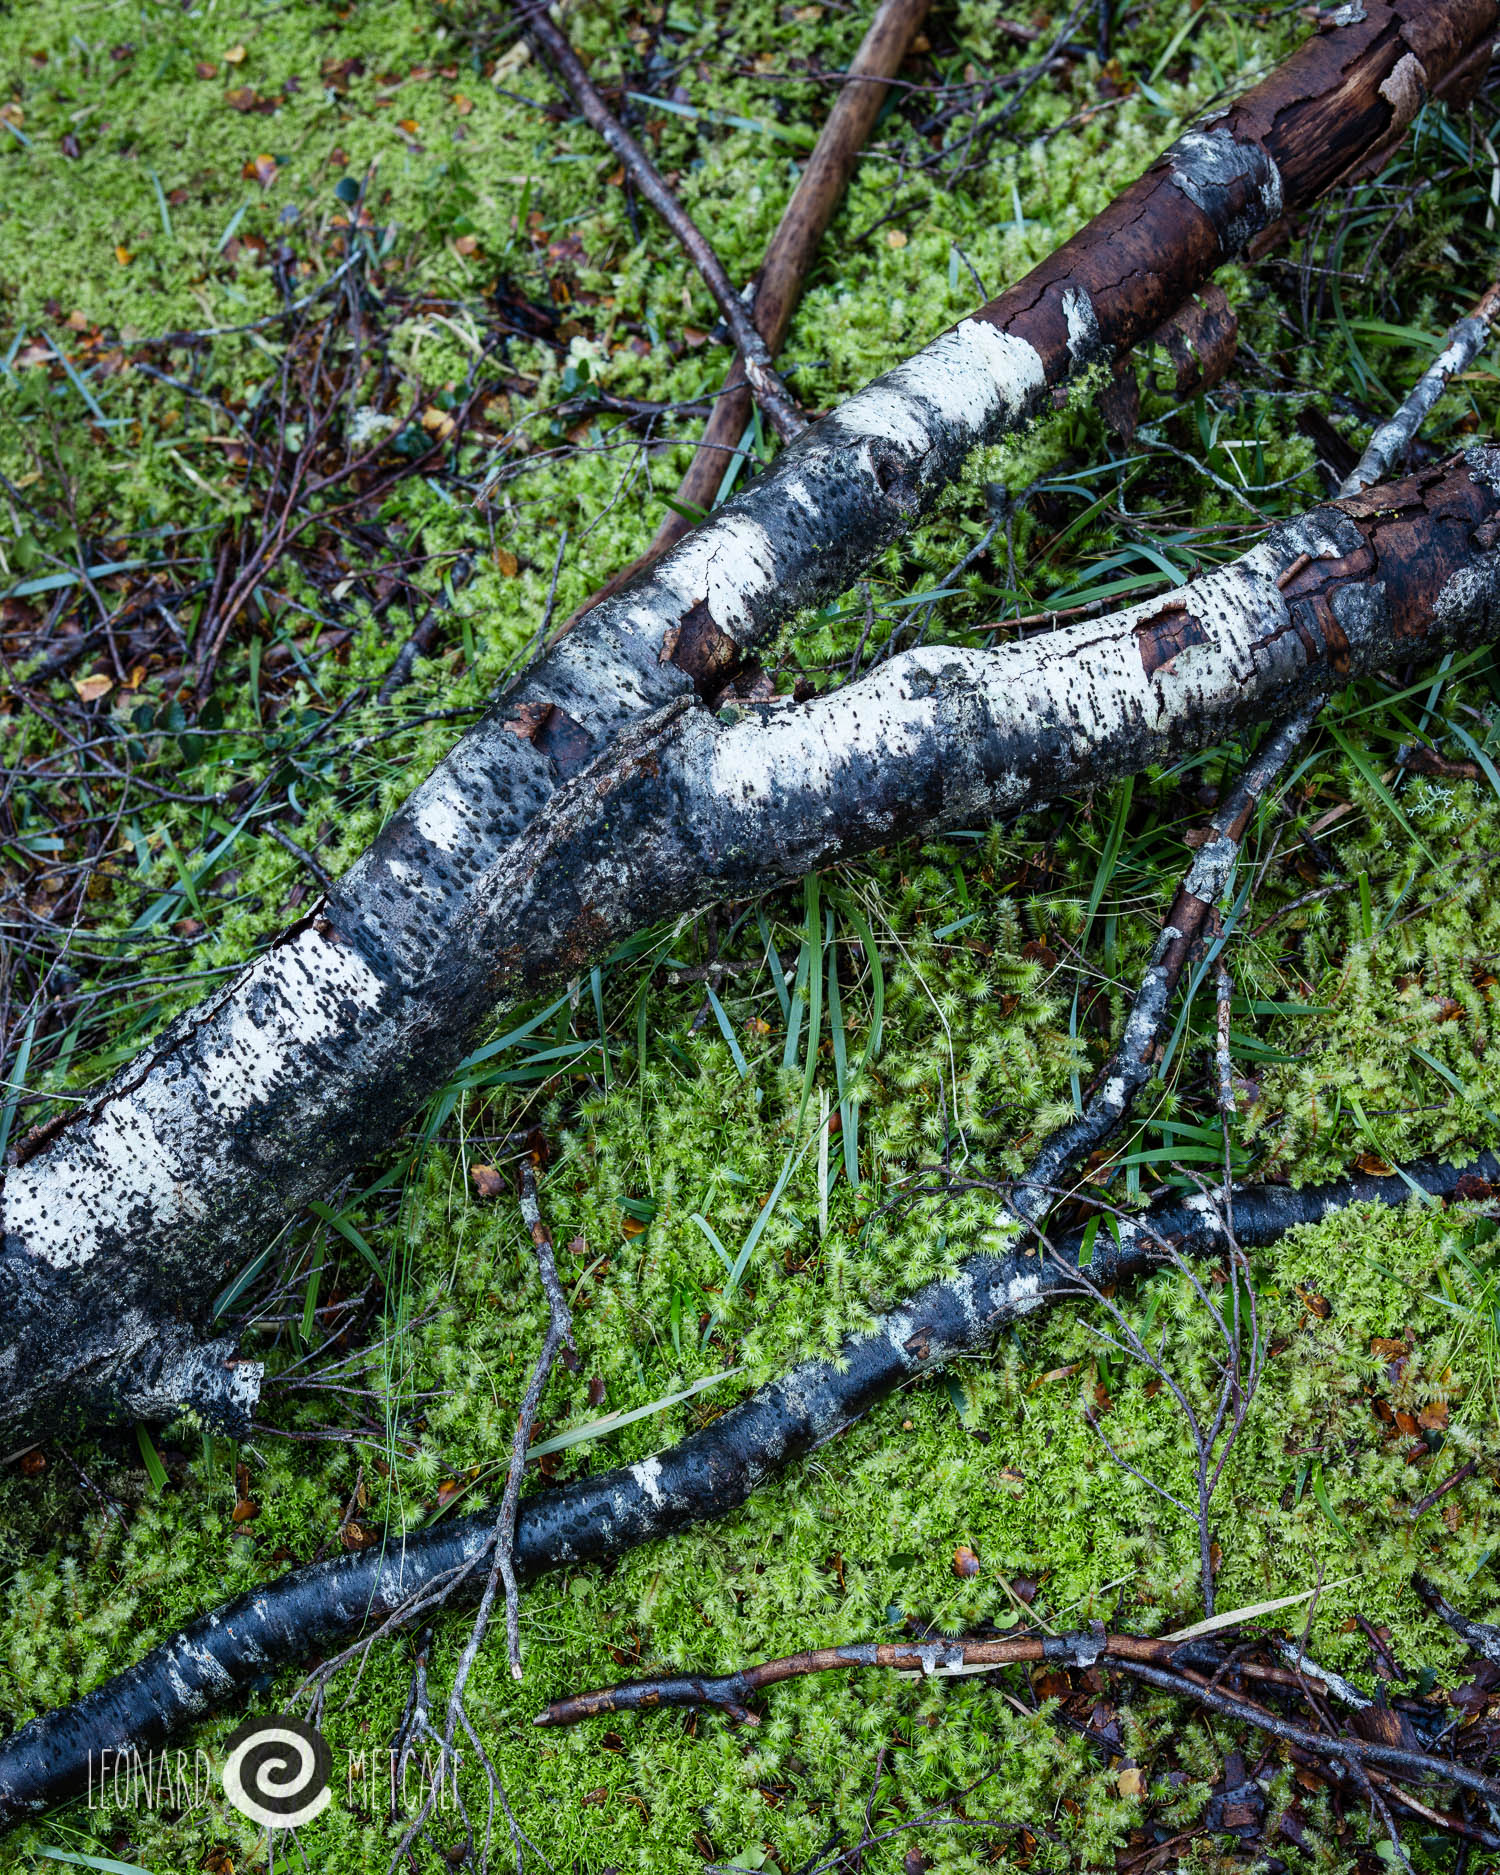
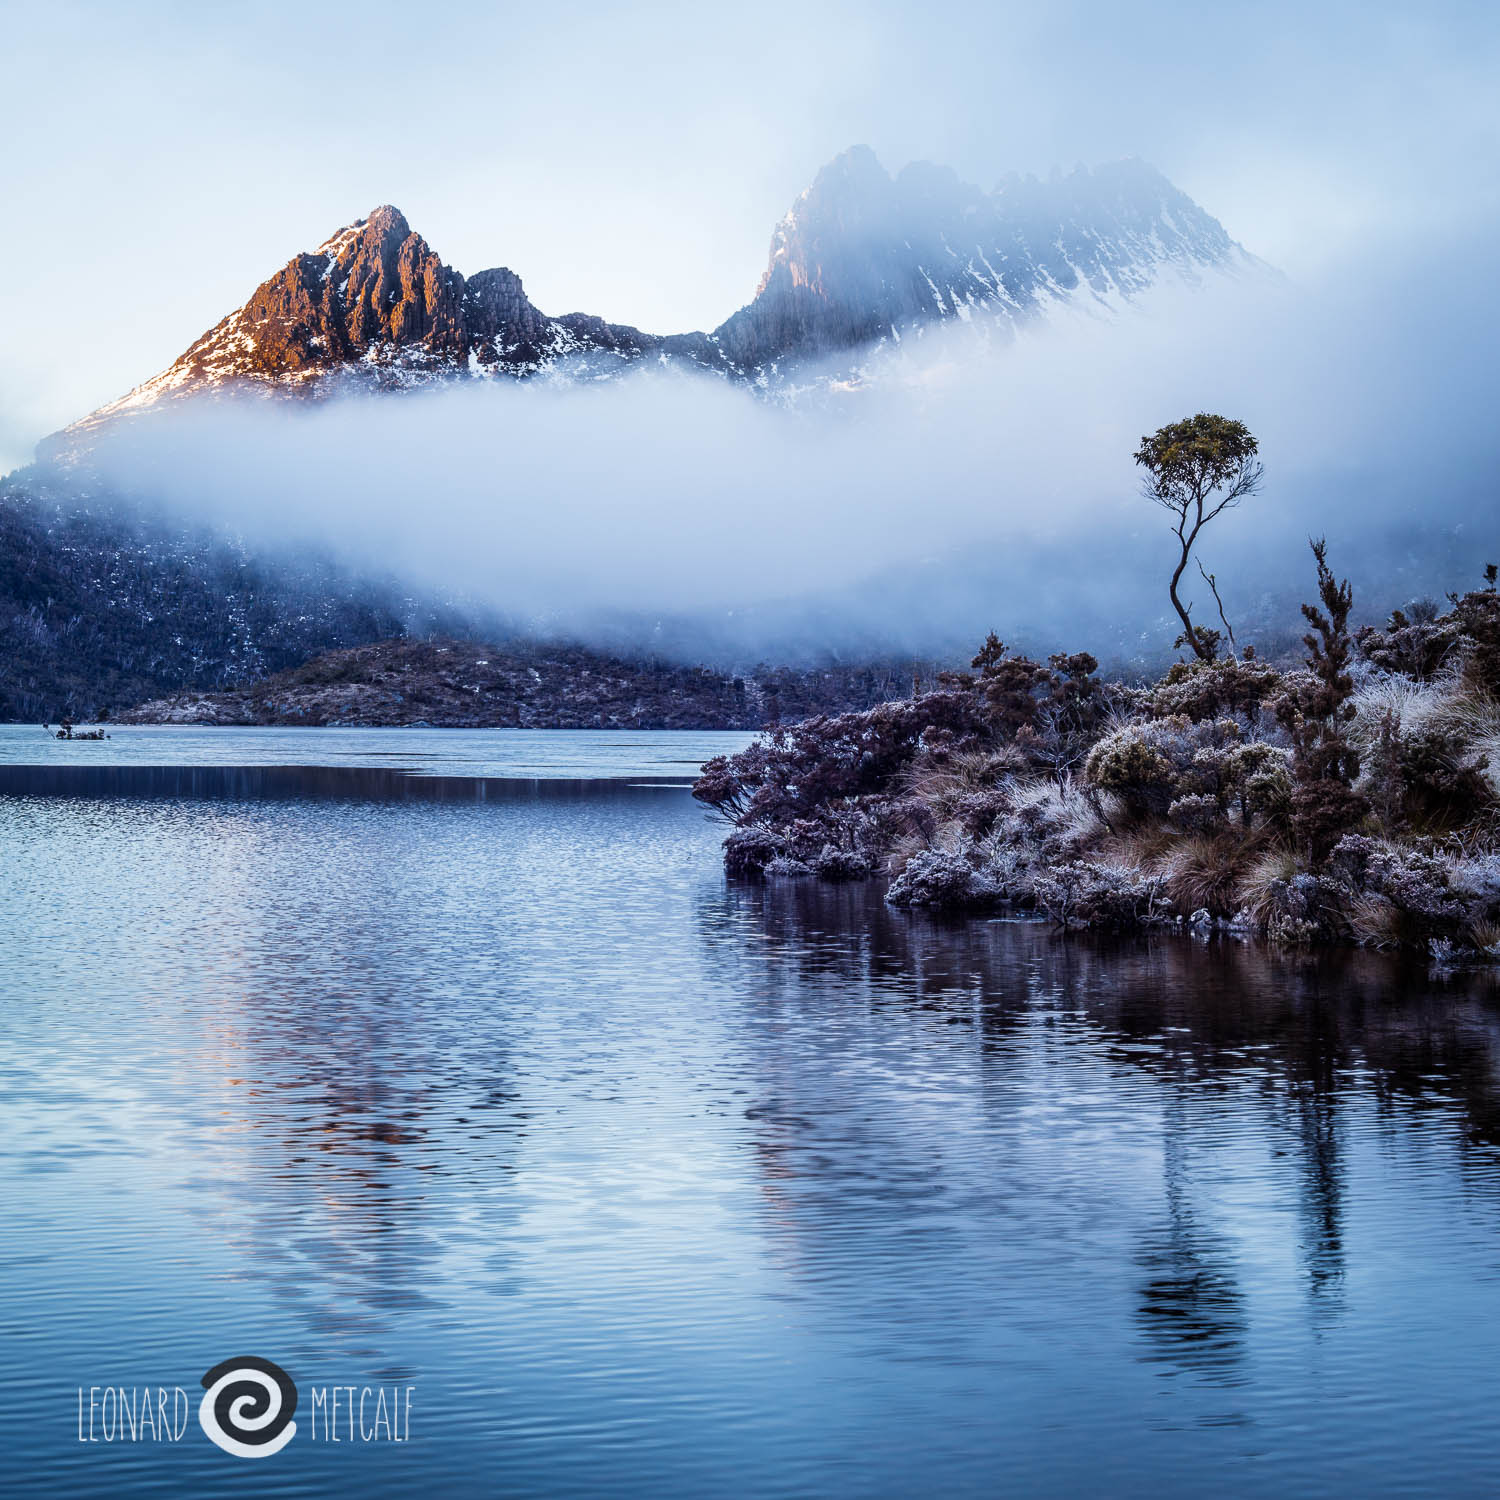
Still haven't captured those trees at Minni Haha to my satisfaction, but I do enjoy this one in the creek. Copyright © Len Metcalf 2017

I am driving down to Minni Haha Falls in Katoomba this beautiful misty foggy morning.  I realise that many years ago I would be coming here because the place was on my tick list of search engine queries.  I wanted photos from all the iconic locations that didn't look like the ones before me.  

I realise now how wrong I was.  Today I come here for the white gums.  There is a stand of stunning trees here and I have failed to capture their beauty so I am hoping the mist will be thick enough and I will find something to photograph.  Today, if the photograph doesn't come, I will happily move on. 

Oh how I have changed. Instead of chasing places I now chase photographs.  So much more fun, relaxing and rewarding.  

Read More
articles Len Metcalf articles Len Metcalf

Depth Captivates

Two photographs showing the difference between a misty mountains day and a clear one.

Whilst, not exactly the same composition, in these two photographs you can clearly see the difference between a clear morning and a misty morning. I love the extra depth the mist brings to the first one. No wonder I love photographing in the mist despite the extra difficulties it brings.

Read More
articles Len Metcalf articles Len Metcalf

Learning to draw, learning to see...

Learning to draw will improve your photography. Learning to draw in charcoal will help you understand and compose in tones. In this short article Len explains why you would want to learn to draw, and how to get started..

Glass House Rocks, Narooma, Copyright © Len Metcalf 2016

Glass House Rocks, Narooma, Copyright © Len Metcalf 2016

Dear Len.

A good friend of mine attended one of your presentations at the Norths Camera Club.
He took some notes of your presentation and on sent them to me. I read these with keen interest and was intrigued by one of your thoughts'- to "Learn to draw with a pencil and charcoal".

When you have time, I was wondering if you could shed some light for me on this thought of yours and how this activity can impact on my photography.

Once again, thank you for your time and help.

Kind Regards

John


Dear John,

As well as an accomplished photographer I am a trained and experienced art teacher. My major at art school was photography while my minor was the beautiful art of lithography, a printmaking process based on drawing with grease pencils and beautiful black inks. Learning to draw taught me how to see and how to compose.

So what does this have to do with photography? 

Firstly it has to do with learning to see. Just as photography is a lesson in learning how to see, so too is drawing. Each discipline will teach you something different. Drawing will teach you how to see. The best photographers can really see. So my suggestion is simple. 

Put a huge effort into learning how to see.

How to learn to draw.  

The best text on how to do this for the beginner is Betty Edwards, Drawing on the Right Side of the Brain. The only better way is to find a great drawing teacher, mind you they are hard to find in my humble opinion.

One of her secrets is learning to switch off the left logical part of the brain that controls what we think we see. We need to really look, and not imagine what we see. An exercise she uses with great success is to turn the object you are drawing upside down (a chair for example) and so you draw what you are seeing and not what you are imagining. The amazing thing is that when you do this exercise you will instantly see a better result in your drawing.  It is like someone turned on the light for you. Before you know it, you will drawing the ground, around the figure with grace.

This is the same reason that photographers love large format cameras for composition. Seeing the image on the ground glass, back the front and up side down, helps distance our logical minds from the what we imagine we are seeing, and really look at the shapes and composition. Do you know when I am giving feedback to my photography students I examine each photograph upside down before I make any comments. 

When you learn to draw you learn to draw using the negative space. You actually measure and concentrate on the negative space. You slowly learn to compose the negative space. As your drawing develops, so will your ability to see, to observe.

Taking this to the next step is learning to draw in charcoal, a beautiful medium. One that requires you getting your hands really dirty. Wear old clothes and really immerse yourself in the drawing. Drawing in charcoal is about loosening up, using more than just your hand, but using your whole body to draw. Best done at an easel standing. Drawing is about connecting with your artwork with your whole body.

Charcoal is a beautifully dense black. Once you have have the basics of line, the next learning is about tone. This is where charcoal really shines. You can easily and quickly block in areas of beautiful tone with charcoal.  Learning how to see the tones and learning how to compose the tones will really help your photography. As I have said previously "Tone trumps colour".

Did you know that artists when they are fleshing out a painting start with a huge wide brush and a dark tone and put them down first. We don't start with a line drawing. We start with the tonal composition. A good trick in learning how to see tones is to squint your eyes. Shut off the cones and go with the rods that work well in low light, we do this by reducing the amount of light to our eyes. Squinting does this quickly.

My last point, is about another similarity between drawing and photography besides the obvious 'drawing with light' with which the term photography is derived. Is that you are usually working on a flat two dimensional rectangular piece of paper. Usually, I say clearly, as you can draw in other shapes, just as you can photograph in other shapes. This similarity is fantastic to work with as the similarities in good composition in a photograph and in a drawing are so similar, each benefits from the other.

So learning to draw will help you learn how to see better. Learning to draw in tones will help you with your composition. 

John, I hope this helps explain what I was thinking when I said that at the presentation.

Thanks for asking.

Kindest regards,

Len

Read More
articles Len Metcalf articles Len Metcalf

Play to Learn

The Tarkine, Tasmania, Australia Copyright © Len Metcalf 2016

Advice on how to PLAY with your Camera and Photography

Play is how we learn. It Is research, it is experimentation, it is getting away from what you

expect. As children, we play to learn, but as adults, we are at risk at losing this ability to

play, due to our adult thoughts and expectations. The best way to learn how to take

photographs is to take them. Playing with what is possible. It is how we discover new

techniques, new ways of seeing and it is how we discover our own photographic style and

signature. To learn and understand we must play more. Through play we incrementally

improve.

Let go the final outcome. Rather than setting out to achieve a photographic masterpiece, set

out to see what you can find visually and what you can create. Explore photographic

variations by creating multiple visual answers, rather than creating just one definitive visual

answer.
— Len Metcalf

By Len Metcalf – from Issue 84 (winter 2016) of Better Photography, page 66

Read More
articles Len Metcalf articles Len Metcalf

choosing a mirrorless camera

John wrote to me yesterday and asked me for some advice about choosing a Mirrorless camera. I started writing back to him, and thought I should turn this into a blog post about my current thoughts on which cameras to consider when going mirrorless.

Wabi Sabi - Hopewell, New Zealand, Olympus OM-D EM-1, Voitlander 25mm f0.95 lens © Len Metcalf 2016

On Friday, 11 March 2016, <john> wrote:

Hi Len

My name is John and I live in Abbotsford Sydney.

I have and am enjoying your photography. Your images are wonderful.
A question that you must be asked by so many, but please forgive the question again.

I know that the most important ingredient to capturing an image is the person behind the camera and the available light. I have been looking to purchase a mirror less camera and the choice is quite bewildering. So many different opinions. I am enjoying your images and am wondering if you can give me some advice re this choice. I would appreciate any help that you could send my way.

Kind Regards

John


Dear John,

The first question you need to ask yourself is what sort of photographs you would like to take?  If tracking of sports athletes is a high priority then Mirrorless may not be the right choice.  Would you like a range of zoom lenses or a set of primes. Is weight and size your highest priority?

The second question is how big will you print? As this can sway your choice with the number of mega pixels becoming important.  If you never plan to print larger than A2 with the majority of your prints at A3 then 16 mega pixels is more than sufficient.  Actually ten was more than enough for my work.

Personally I am very biased towards Micro Four Thirds because it is an open mount.  Meaning that any manufacturer is welcome to join and make cameras or lenses. I think this is admirable in a world where competitors try to keep you tied into their brand by forcing you to lock into their system. Because of this you have the widest range of cameras and lenses of any other mirror less system.  For ethical reasons alone Micro Four Thirds is a sound choice.  I find the lenses and bodies a lovely compromise between size, sharpness and quality.  I always hoped some other camera manufacturers would come on board such as Fuji, Leica and Sony or lens makers like Zeiss, but alas they have chosen their own paths.

The Micro Four Thirds system clearly has the best and most comprehensive lens choice in any of the Mirrorless systems with around 70-100 lenses to choose from. I must admit I don't know how many there are. I started counting and stopped at fifty and still wasn't close. There is a list on this page here.

I am also biased towards in camera image stabilisation.  It works very very well and it can be used on any lens.  I can hand hold at half a second and get a reasonable photograph.  It is just so fantastic for people that have trouble hand-holding. 

Olympus is by far my favourite mirror less camera manufacturer.  My love affair with their cameras started with my OM-1, my first slr. My first camera I loved.  It was the first compact slr and it is no coincidence that its dimensions closely matched the Leica M3 as it is also a lovely camera to hold and use.

In Micro For Thirds their cameras are a firm favourite for still photography.  The sensor based image stabilisation system is outstanding and for that alone their cameras lead the pack.  Some of the cameras are too small and benefit from extra grips. I always buy the Really Right Stuff camera plates and add them to the camera. The EM-5's handling substantially improves with their extra grip. The EM-1 with the Really Right Stuff base plate extends the camera body just enough to get my little finger around it which makes the camera very comfortable in my large hands. For all day use the EM-1 is my preferred camera, and for walking where every ounce counts I like the EM-5 mk2, which is also my preferred camera for videoing as it has a headphone jack in the extra grip so I can monitor my audio input levels.

The Panasonic cameras are well known for their beautiful colour renditions and their high quality video. One of their latest models now includes sensor based image stabilisation.  A huge improvement which I hope to see on all their future cameras.  I can't comment on their use as I have never used one. You tend to find that Micro Four Thirds users are either in the Olympus or Panasonic camps and won't consider the other. A few members of my family have Panasonic cameras who aren't very serious photographers so they shoot in jpg and print or share their work. The colours and photographs from the Panasonic cameras is always outstanding. So I have no reason to doubt their quality. It was that the image stabilisation system they initially developed didn't work with my favourite lenses.

Fuji has a solid range of mirror less cameras. They are renowned for their beautiful colour rendition and and lovely lenses.  They use a very different sensor array. The colours are layer out differently and therefore many third party image processing engines used to struggle with processing their raw files. So make sure you check this out before going ahead with Fuji.   Some may find their lens choice limiting while others say it sufficient. Fuji cameras are very popular among street shooters as there are a few models that have hybrid viewfinders that allow for either electronic or optical and both mixed together. A feature that isn't seen in any other manufacturers cameras.

Sony's latest mirror less offerings now have sensor based image stabilisation. They apparently work equally as well as the Olympus ones. My theory is that they bought half of the company just to get this technology then sold it on latter once they had it. There are few lenses to choose from and the lenses are much larger than Micro Four Thirds. So you may find you end up with a heavier kit. Many of my students went to a shop to buy an Olympus and came back with a Sony. I think the full frame and large mega pixel count is an easy up sell (the camera store makes more money when you buy a more expensive system).  You will be spending 2 - 3 times as much money as you would on an equivalent Micro Four Thirds kit when you consider the lenses. It would end up being nearly twice as heavy overall too.  Mind you these students who have gone with the Sony love them dearly and haven't ever looked back. There is plenty of room if you want to crop. They also make an amazing low light camera that has great high ISO capabilities. The Sony system has limited lens choice so consider if they have the lenses you want before committing to it.


I haven't looked at the Canon or Nikon offerings in Mirrorless much as they seem to be very limited with lenses.


The new Sigma Quatro looks interesting, though only a few lenses might be limiting. The Samsung Mirrorless System didn't pass the economic test of time.


The only other Mirror less camera I would consider is the Alpa / Phase One A-Series combination which I actually lust over.  When I can afford the price of it yes I would love to use it, but alas for now the plus price tags put it firmly in the 'Len you're dreaming' category.


When buying a new camera I now start with the lenses, for the most interesting and desirable camera in the world is useless to me unless I can find an as equally desirable lens. I have written an article on my thoughts for Micro Four Thirds lens choices, which you can read here.


I have another article brewing in my head comparing full frame with micro four thirds, with the advantages going to micro four thirds. After the last nine months with a full frame DSLR, my conclusion is that it is not worth the pain it causes. ;)


I wish you well in your search and purchases


Kindest regards


Len


Read More
articles Len Metcalf articles Len Metcalf

10 rules for teaching

“Do not fear to be eccentric in opinion, for every opinion now accepted was once eccentric.”

Enchanted Forest floor, Cradle Mountain, Tasmania © Len Metcalf 2015

Perhaps the essence of the Liberal outlook could be summed up in a new decalogue, not intended to replace the old one but only to supplement it. The Ten Commandments that, as a teacher, I should wish to promulgate, might be set forth as follows:

  1. Do not feel absolutely certain of anything.

  2. Do not think it worth while to proceed by concealing evidence, for the evidence is sure to come to light.

  3. Never try to discourage thinking for you are sure to succeed.

  4. When you meet with opposition, even if it should be from your husband or your children, endeavor to overcome it by argument and not by authority, for a victory dependent upon authority is unreal and illusory.

  5. Have no respect for the authority of others, for there are always contrary authorities to be found.

  6. Do not use power to suppress opinions you think pernicious, for if you do the opinions will suppress you.

  7. Do not fear to be eccentric in opinion, for every opinion now accepted was once eccentric.

  8. Find more pleasure in intelligent dissent than in passive agreement, for, if you value intelligence as you should, the former implies a deeper agreement than the latter.

  9. Be scrupulously truthful, even if the truth is inconvenient, for it is more inconvenient when you try to conceal it.

  10. Do not feel envious of the happiness of those who live in a fool’s paradise, for only a fool will think that it is happiness.

The Autobiography of Bertrand Russell

Sourced from Brain Pickings

Read More
articles Len Metcalf articles Len Metcalf

10 rules for students

“Nothing is a mistake. There’s no win and no fail, there’s only make.”


Dove Lake & Cradle Mountain © Len Metcalf 2015


“Nothing is a mistake. There’s no win and no fail, there’s only make.”

RULE ONE: Find a place you trust, and then try trusting it for awhile.

RULE TWO: General duties of a student — pull everything out of your teacher; pull everything out of your fellow students.

RULE THREE: General duties of a teacher — pull everything out of your students. 

RULE FOUR: Consider everything an experiment.

RULE FIVE: Be self-disciplined — this means finding someone wise or smart and choosing to follow them. To be disciplined is to follow in a good way. To be self-disciplined is to follow in a better way.

RULE SIX: Nothing is a mistake. There’s no win and no fail, there’s only make.

RULE SEVEN: The only rule is work. If you work it will lead to something. It’s the people who do all of the work all of the time who eventually catch on to things.

RULE EIGHT: Don’t try to create and analyze at the same time. They’re different processes.

RULE NINE: Be happy whenever you can manage it. Enjoy yourself. It’s lighter than you think.

RULE TEN: “We’re breaking all the rules. Even our own rules. And how do we do that? By leaving plenty of room for X quantities.” (John Cage)

HINTS: Always be around. Come or go to everything. Always go to classes. Read anything you can get your hands on. Look at movies carefully, often. Save everything — it might come in handy later.


Sister Corita Kent, Learning by Heart: Teachings to Free the Creative Spirit

Sourced from Brain Pickings.

Read More
articles Len Metcalf articles Len Metcalf

additive or subtractive photography

Are you an additive or subtractive photographer? Something worth thinking about in your compositions. 

Stone circles, South Coast of NSW © Leonard Metcalf 2014

I wonder if there are two schools of thought. One where photographers wander around with their cameras wondering what to add to their photographs, and the others who are thinking about what can be removed to make their photographs stronger. 


Perhaps the the first approach is the one of the novice, while the latter is the thought processes of a master. 


Which one are you?


Ralph Gibson is the latter. Here he describes his process of subtraction.  


"....if you’re going to make a drawing, you take a paper and a pencil and add lines, add marks, until you finish your drawing. It's additive. When I make a photograph, I move in closer and I take things away, and I take things away, until I get everything out of the frame except what I want. Therefore my process is considered subtractive." 


He goes on to explain how he does it... 


"Now part of this subtraction has to do with casting things into deep shadow. I eliminate a lot of unwanted material, activity into the shadow area. And in so doing, create a shape. Instead of just being a variation on light, for me shadows become cut forms, they become shapes. And I discovered this by photographing primarily in bright sun and exposing for highlights, which is pretty easy to do. Most people struggle to get detail into their shadows. I was never interested in that kind of photographic expression particularly.   - Ralph Gibson


source for quotes: http://bermangraphics.com/press/ralphgibson.htm

Read More
articles Len Metcalf articles Len Metcalf

what makes a great photograph?

time makes a great photograph

Model: Angel Rose © Leonard Metcalf 2014

The key is that the longer I want to keep looking at a photograph, the better the photograph is. If lots and lots of other people want to look at the photograph and keep looking at it for a long time, then that is proof that it is a great photograph. So to me the thing that makes a great photograph is time.
— Leonard Metcalf 2014
Read More
articles Len Metcalf articles Len Metcalf

what is fine art photography?

Len examines what makes photograph fine art photography... 

Mea Culpa in a grass field in Sydney © Leonard Metcalf 2011

Collectability

Fine art photography has been defined by how collectable the photographs are or become. Are the images enduring enough to stand the test of time. For some the ultimate goal is to have their images preserved in museums and art collections, or in the possession of collectors. What makes an image collectable varies widely from the image or content, process, photographer and historical significance. Many collectable photographs are indeed not fine art. In discussions with a gallery owner, one of the key ingredients of a collectable photograph was its rarity (ie limited print run, by edition or death).


Archival stability

Tightly aligned with collecting is the expectation that fine art photography can survive time, long term storage and display. Though this alone does not guarantee that the image is indeed fine art. Many photographs that have been actively collected (bought and sold for high prices) may not indeed be archival, but it does seem to be of primary importance to modern photographic collectors.


Art for arts sake

Because I enjoy taking photographs against my own criteria for what a great photograph is. It is the reason I study other photographers’ (and artists’) work with such passion. To observe, to copy (for the purpose of learning) and then to produce something that is indeed different. Finding ones own personal vision in a world of appropriation has become a life long passion.


Communicates

My passions for the Gaia (mother earth) and deep felt desire to stop humanities abuse of her lie beneath my wilderness (landscape) photographs. If Dombroskis’s photograph of Island Bend can educate and influence a voting public into saving the Franklin River (Tasmania), then there is hope in nature photography to be able to influence the world to move towards an environmentally sustainable future. Art by its very nature is about the communication of ideas, principles, thoughts, feelings and passions. When you look at one of my photographs you are indeed looking through Len’s lens, my interpretation of the world and what I see.


Aesthetics

My goal is to produce an aesthetically pleasing photograph without copying those who have gone before. When you look at a photograph and you get that wonderful feeling inside, because of its inherent beauty, then it must be fine art. Not to say that all fine art makes you feel good.


Made by an artist

What makes an artist? Creativity as expressed in an artwork… is perhaps one of the only clearly defining links between artists.


Sold as art

Recently I have started to wonder if the ongoing sales and popularity of particular images, some just seem to keep on selling, are really fine art images. Some of my most outstanding fine art photographs (measured against my own criteria) have never sold. Sales is a worthless criteria if you are to judge fine art by what history has demonstrated with very few artists gaining success in their own lifetimes, though since modernism this no longer appears to be the case.


Fine art

“Essentially the distinction between ‘art’, ‘craft’ and ‘APPLIED ART’. The modern notion of ‘fine art’ can be traced back to the Renaissance when ther was a strong movement, led by Leonardo da Vinci, to demonstrate that the painter in particular was practicing an intellectual and not a manual skill. Included under this heading are drawing; music; painting; poetry; printmaking; sculpture; (photography ed) and other forms of art which do not fulfil a practical function.” 

- Reynolds, K & Seddon, R 1981 ‘Illustrated dictionary of art terms; a handbook for the art lover’; Edbury Press, London


Fine art photography

“…the term is taken to be a picture that is produced for sale or display rather than one that is produced in response to a commercial commission. It is assumed that most of the pictures that are covered by the fine art banner are personal images that meet self-imposed criteria, and that they are, as a result, very close to the heart of the photographer and are representative of his or her interpretation of the world.” 

- Hope, T. 2003 Fine Art Photography, creating beautiful images for sale and display; RotoVision SA, Switzerland

Read More
articles Len Metcalf articles Len Metcalf

Len's camera equipment

Len lists his camera bag contents

Cradle Mountain Hut, Tasmania © Leonard Metcalf 2014

This is rather dated now…. if you are interested in what I am using now? November 2020

  1. Olympus OMD EM1 mk2

  2. Voitlander 25mm f0.95

sometimes I also use:

  1. Voitlander 60mm f0.95

  2. Olympus 75mm f1.8

  3. Olympus 300mm f4

For ultralight kit for extended bushwalks:

  1. Olympus EM5 mk 3

  2. Panasonic 25mm f1.4

For Abstract Photography I have a full spectrum modified camera

  1. Olympus OMD EM1 mk2

I occasionally use a full frame, but would love to sell it.

  1. Panasonic S1r

  2. Panasonic 50mm f1.4

I have sold and also tried

  1. Fuji GFX 50s

  2. Fuji 63mm f2.8

I am currently taking a hiatus on film and have a fridge with 4 x 5 & 8 x 10 film waiting for inspiration and time to be right to use.


Len dives into this equipment list and leaves some of it at home.

Camera bag

  1. Pea less emergency whistle (Len will supply)

  2. Ultra light head torch (Black Diamond)

  3. Camera

  4. Lenses

  5. Spare memory

  6. Neutral density filters

  7. Polarising filter

  8. Spare batteries

  9. Lens cleaners (tissues, cleaning fluid & micro fiber cloth)

  10. Cable release or remote control for camera

  11. Lens shades

  12. Reading glasses

  13. Camera manual

  14. Camera bag to put it all in

  15. Light weight umbrella

Digital camera specifics

  1. Olympus OMD EM-1

  2. Olympus OMD EM-5 (spare camera)

  3. 7.5mm f3.5 Samyung lens (15mm equivalent)

  4. 14mm f2.5 Panasonic lens (28mm equivalent)

  5. 25 mm f0.95 Voitlander lens (50mm equivalent

  6. 45mm f1.8 Olympus lens (90mm equivalent)

  7. 60mm f2.8 Olympus macro lens (120mm equivalent)

  8. 75mm f1.8 Olympus telephoto lens (150mm equivalent)

  9. 75mm - 300mm f4.8 - 6.7 Olympus telephotos zoom lens (150mm - 600mm equivalent)

  10. 2 Olympus spare batteries for OMD

  11. 32 & 16 gb Scan disk Extreme Pro memory cards

  12. Olympus battery charger for OMD

  13. BW circular polariser

  14. BW 10 stop neutral density filter

  15. BW 3 stop neutral density filter

  16. Kodak lens tissues

  17. Lens cleaning fluid

  18. Micro fiber lens cloths

  19. 2 x Lacie rugged external hard drives

  20. Macbook pro 13" retina display notebook

  21. Macbook pro power cable

  22. Ipad mini

  23. Ipad power cable


Film camera specifics

  1. Razzle 900 DF 4 x5 camera

  2. Fujinon W 5f.6 150mm lens

  3. Linhof technica III

  4. Fujinon A 180mm f 5.6 lens

  5. Toyo G 8 x 10 monorail camera

  6. Nikkor 300mm f 8 lens

  7. Changing bag - Harrison pulp tent

  8. 4 x5 dark slides (lots)

  9. Spare film boxes

  10. Pentax digital spot meter

  11. Goosen Digisix incident light meter

  12. Film 4 x 5 sheets: HP5, Delta 100, Porta 400, Velvia 100

  13. Film notes / reciprocity information

  14. Bellow extension calculator

  15. Spare batteries for both light meters

Tripod and camera supports

  1. Really right stuff camera plates & L plates for all cameras

  2. Gitzo carbon fiber tripod series 3

  3. Linhof ball head Provi II

  4. Gitzo carbon fiber tripod series 1

  5. Linhof ball head I

  6. a Manfrotto heavy one

  7. Really right stuff pano head and nodal slide

Camera repair kit

  1. Filter wrenches

  2. Tweezers

  3. Magnifying glass

  4. Tape

  5. Sensor cleaning kit

  6. Screw drivers

  7. Pliers

  8. File / metal saw

  9. Lens cleaning supplies

  10. Giottos pocket rocket

Read More
articles Len Metcalf articles Len Metcalf

BP1 Musical secrets

What can a visual artist learn from musicians when a creative block is encountered? Len’s first article that went viral.

Sydney coastline - Northern Beaches © Leonard Metcalf 2012

What can a visual artist learn from musicians when a creative block is encountered?

I attended a workshop held at Woodford Folk Festival (December 2002) where a panel of musicians revealed their methods for unleashing their creativity, when they find a creative block. On reflection I found their advice was accurate for me as a visual artist, which I was able to apply to my own creative endeavour of taking photographs. What follows are the main points they described and how I applied them to my photography. Though I believe these would be equally applicable to any artistic or musical endeavour. Do something else. The suggestion of going out for a swim or a walk, or perhaps even settle into good book, though most of the panel suggested something active to get the blood flowing. Now being a landscape photographer this is so easy to do, put the camera in a pack and take off. I find that after a while I start seeing the photographs, usually after I have relaxed enough to let go of all of my current issues and distracting thoughts.


Create something / anything.

After discovering this for myself, I changed the way that I work. When I first arrive at a new venue, or after a long period of time without producing images, I start shooting straight away with my digital camera instead of lugging my heavy large format equipment around. With the high cost of large format film and processing I have learnt that I am often frightened of making a mistake and I just don’t see fantastic images. This is a similar phenomenon when confronted with an expensive sheet of paper when drawing or painting. When drawing I use a cheap sketch pad to warm up on first, then go to the expensive paper. Digital photography offers me the same cheap experimentation where there is no such thing as an expensive mistake. Now I start creating straight away, and I soon found that getting to my peak creative mode now happens in less time than before. That the doing shifts the block. So when you feel all blocked just go and start… and see what happens…


Coastal Sydney © Leonard Metcalf 2012

Make it a way of life. 

For me this has been one of the hardest things to achieve. With the fear of not being able to pay the mortgage, or the rent. The fear of losing that fantastic job (the one that you are good at but don’t love like you love creating). The fear of not being successful, or seen as a failure. The pressure that the family and friends put on you. Overcoming it all and devoting ones self to being an artist is one of the key ingredient to success. This idea is well developed in many other authors work.

An attitude of being in service to the medium. I am still thinking about what this means… Do I promote the art form to all who are interested in it? Do I actively become a member of the community of artists around me who also work the medium. Do I share my thoughts, ideas and techniques with others? Is it my tool, or am I

Work with other creative people.I love working creatively with other people. Do you know how I hate those days locked up in the darkroom by myself, and how much I love sharing the space with others. The opportunity to talk, ask, and question. To get feedback on the fly. To see someone else get excited by a possibility and that excitement rubbing back onto you. I love going out on a shoot with other photographers, and seeing what can be found. At one point I was scared that they may steal my ideas, but this is a false notion, one that destroys creativity. Two photographers, same subject matter, and no matter which two you put together, I guarantee that you will get different images. Great art is about being in touch with your emotions and communicating them to others. Two people never have the same emotional response to the same stimulus, it may be similar, but it will never be the same. So join a club, go shooting with a friend, draw in a group, print with fellow artists. Every time you work with another creative person you will benefit, and so will they, what an outstanding opportunity. I wish they would happen more regularly with me.

Channel Creativity 

Allow the creativity to channel through you and channel all your energy into creativity. Are you like me and have a number of creative projects underway at once? I wonder what it would be like if I managed to concentrate on one medium at a time? Painting, drawing, thinking, writing, working, teaching and finally photographing. I wonder how much creative energy I waste? What will be like when I am totally focused on the one thing? When I get there I will tell you…

Limit your possibilities.

In landscape work I can limit my possibilities by restricting myself to a geographic area, returning until the images come to me. When doing life work, I concentrate on a particular part of the body, or on a particular theme. For example I often pick chiaroscuro as the theme, and look specifically for images that are based on form. Another one may be wild flowers, my garden, or my friends. One of my favourite projects where I limited myself was taking a portrait of each of my friends before I left Kuwait. I had a mental list of who I wanted shots of, and slowly I worked my through that list. Often with failures I had to return to a specific subject and re shoot. But by limiting myself to the most important part of my life at that time (my friends) I was able to produce a fantastic exhibition even if it is only for my own private viewing. The musicians gave some good examples, like writing a song just about a fridge. So give it a go, try and limit your possibilities.

Learn all the rules, basics and foundations then switch them off. 

The rules of composition and great photography abound everywhere, while it is one of the most debated topics at gallery openings. I have found them to be invaluable to learning to tune my visual intelligence. Learning what others like is another way of tuning your visual intelligence, and that is what a compositional rule is. It is what people in the past have found visually attractive. I learnt more by surveying my potential clients as to which of my photographs they would purchase, than I did by reflecting on my own work. I soon learnt that my favourite image was the least favourite of my audience. My photography soon grew and changed as a result. It wasn’t selling out, but tuning into what works and doesn’t work with others.

Tarkine coast, Tasmania © Leonard Metcalf 2014

Copy other peoples creativity.

I can recommend studying the work of other masters. When learning to draw, at art school, we had to copy the work of the old masters, so you could master their techniques. I now study as many other photographers work as possible. I examine critically every photograph that has any relationship to the work that I produce. You can be sure that I know all of the major landscape photographers work and many of the lesser known ones too. When I got bored with that I switched to nudes, but I still keep my eye out for any landscape image that I haven’t seen before. By saying this I am not advocating the appropriation of other peoples work to make money from or to even claim it is your own. I am suggesting that you can learn a lot from other peoples work, by copying and learning the techniques that they use. Yes I have gotten up predawn, and gone to a pre identified location to take a sunrise shot, so I know how to do it, you won’t see that image here on my web site. From doing this I learnt about their technique, their approach, how they work. It helped me become more comfortable and confident with the way I love to work. Do you want a project? Try a capsicum, and look at the work of Edward Weston, or perhaps a toilet bowl. You can look at Weston again for his classic studies of these everyday objects, or even try Duchamp. I wonder who did it first?

Be persistent

Great creators are persistent, they practice, they fail, they try again and again. In management training the old story of Cl Sanders and his special recipe for deep fried chicken is a favourite to illustrate this point. Do you know he spent a lot of time going around trying to convince people about his fantastic recipe, he would cook it for each shop he went too. Each time he got a no.. and he kept on going… kept getting no’s until one day… well KFC was the result of all of those failures. Another interesting approach in photography is to shoot and shoot and shoot… Many people do it, actually many professionals do it too. They keep shooting, and with the law of averages, a good photograph will turn up in there somewhere. How many times have I tried to sell my photographs… I just kept trying… was the mat the wrong colour, should I sign or not sign my work, will a limited edition do better than unlimited prints… is the price pointing right? Is the location of the gallery right? If I gave up the first time I failed to change careers to being an artist, or even the second or the third, I would not have made it to where I am now. Be persistent. Keep trying. There are no such things as failures, just learning experiences. Just ask any teacher.

Love it and immerse yourself in it. 

Not because you are good at it, but because you love it. I often am in this conversation. Should you do something because you are good at it or because you love it. So many people I know do what they do because they are good at it, it makes them plenty of easy money, yet they don’t love what they do. Me I believe that loving it is the key to be great at it. When I loved teaching I was great, when I hated it I could only ever achieve mediocrity, finding what I loved changed my levels of performance. So you want to be a great artist, well you have to be in love with it.

Confidence and continual practice. 

Have the confidence to do what you want, and the insecurity to continue practising. Don’t you love the simplicity of this point. A BFOTO ( a blinding flash of the obvious) (is that the right acronym Hayley?)!!! Do you ever master something? Ask an accomplished musician, they still practice, the dancer, or any performer, they spend more time practising than performing. No wonder when we look at them we see masters. They spent all week practising for that performance. How often do you practice?

Follow your dreams and take make the most of every opportunity that comes your way.

l Do you know this was one of my turning points for me. When I realised that the universe was throwing at me so many opportunities my way and I didn’t have the energy to pursue them, I knew that things had to change. Each night in my dreams I was being confronted with what I should be doing. If I dreamt of my current work I’d wake up sad, if I dreamt of photography I would wake up happy. It was very easy dream interpretation. I should be doing what I love. And when I did make that huge leap into the unknown more and more opportunities just kept falling into my lap. What are your dreams telling you? What opportunities are you missing? Let the universe be one of your guides.

Be spiritual

You are apart of something, something internal that wants to come out through your creations…

and lastly

Just start…

Note: As I have now lost the Woodford program 2002/3, if you know who was in this panel, the name of the organisers, please email me so I can add the due credits to this wonderful list of creative suggestions. Thanks, for you taught me a lot in that short hour… 2003

Read More
articles Len Metcalf articles Len Metcalf

Faces in the Canyon

The story behind my first iconic image....

Faces in the Canyon, The Greater Blue Mountains World Heritage Area © Leonard Metcalf 2000

A late start... A very very late start! Facilitated by the late night commitment to go and take some photographs in a canyon the night before. I can easily blame Jamie. "Len, I think you need a couple of black and white photographs in your gallery." So I had one packet of Kodak T400CN in 4 x 5, and loaded up ten shots into the five dark slides. And proceeded to add some black and white images to my colour collection of The Greater Blue Mountains Wilderness, and to my collection of canyon photographs I had been working so diligently on.

But I can't blame Jamie for being up with me late, playing pool and drinking. That was equally my fault. And was the usual past time at our house at Mount Piddington. So this Friday night was no different to many others.

I wish I could say we were up at the crack of dawn, but we weren't. I don't think we managed to get out of the house before 2 pm. I packed the Linhof Technica III with a Nikkor W 150mm f5.6 lens into a small pelican case, the tripod went into a extra long dry bag. All of which was thrown into my pack with my wetsuit, and other little luxuries like a thermos, a hand towel and my antacid. Desperately needed to help me recover from the excessive drinking.

We walked down the exit track into the canyon, passing many as they walked up the hill in the late afternoon. There was a crowd at the beach, while we blew up our lilos (air beds). Strange looks as we departed upstream. "Where are they going at this time?"

A few kilometres up stream. Some wading, some walking some paddling bought us to the tributary canyon. The walls are so tight that you can't walk through with your pack on. Particularly with a pack with a Pelican case in it. When we reached 'the green room', Jamie left me for a while, and he headed up stream further to explore. While I toweled my hands dry and started to get my camera out and set up on the tripod.

This was the first photograph I took that late afternoon. It was the single exposure onto black and white film. I scrambled around to try and get a few more shots, and manged to compose two more, which I took on transparency film. My companion was soon back, reminding me that it was time to leave this beautiful spot. So we headed off. The canyon was quiet now. Being so late in the afternoon, all the smart canyoners had left. We had the place to ourselves.

Drifting downstream on your lilo, on your back, leaning against your pack, gently paddling downstream is magical. You look up and all you can see is stunning photograph after stunning photograph. Each to snapped in my internal photo album that exists only in my head, only for me to see and look through.

Back at the sand beach where we had walked in, we could change, back into some clothes, and drier shoes. We donned our wet packs, still dripping with the cold canyon water and headed back up the hill.

It was very late by now, and we had miss-judged our daylight. As we topped the steep cliffy rise, past the small climbs we lost daylight. Neither of us had bought a torch. We walked slowly, just able to see the break in the ferns that marks the footpad. Between the king ferns a light started glowing. A full moon was just rising, and the darkness soon lifted. We were able to easily walk back to the 4WD and head home to relax with another beer, a hot shower and yet another game of pool.

This photograph didn't come up too well in the proof that I had ordered when it was developed. But there was enough there to show me that it had potential. A drum scan soon changed that, and this image jumped to life. I used it as the marketing image when I opened the "Leonard Metcalf Gallery" in Katoomba. I had it on posters and a post card. People would show up to the gallery with the post card in their hand (they needed the map that was on the back to find me). I would ask them why they came, and they always replied and pointed to this image.

On that original postcard I had named the location of this shot. The local outdoor guiding companies had a 600% increase in requests to go this particular canyon. So now I don't tell the location, and prefer just to tell you it is in The Greater Blue Mountains World Heritage Area, in a canyon somewhere.


Details

Catalog number: 0001

Camera: Linhof Technica III circa 1950 4 x 5 inch

Lens: Nikkor W 150mm f 5.6

Film: Kodak T400CN

Read More
articles Len Metcalf articles Len Metcalf

camera love

Does your choice of camera matter? For me loving my camera is so so important. It comes with time, so you love the moment you see them, others take time to fall in love with. For some advice on how to fall in love with your camera read on. 

My beloved Ebony 45 SU which now has a new home and is hopefully serving its new owner well. I could set this camera up blind folded and had a very specific system when using it. © Leonard Metcalf 2012

People regularly say that your camera doesn't matter, but unfortunately it really does. Yes a good photographer can probably make use of any camera to make satisfactory images. It does take special tools to make outstanding photographs. Photographers at all levels should and do spend copious amounts of time choosing cameras on their performance, handling, features and lens sets. I am no exception. My favorite blog is a camera rumors site. Yes, I do admit to being a gear junkie.

Besides, it is important. No, it is crucial to love your camera. You must know your camera intimately, its foibles, its limitations, how it handles and how to coax every last drop of creative juice from it. Choosing a camera is no lesser of importance than choosing your life partner, though luckily you can trade your camera in, and keep updating it. Some even recommend that a new piece of equipment can help break that creative deadlock that many of us find ourselves in every now and then. 

Spending time on the couch, playing with your camera (an exercise promoted and described by Bruce Barnum called 'Camera Cuddle'), learning and practising using it until it becomes second nature. An extension of you. Just today I was reminded of this as I had my camera suspended upside down, just an inch from the ground taking close ups of a stunning red fungus that Emily Reader found. Suddenly I was changing my settings, basically from memory and feel. I was glad that I had spent considerable time memorising every control on my camera. All of those hours practising on the couch while watching tv certainly paid off.

Lens love is worth considering as well. How intimate are you with your lenses. I don't mean taking them to bed and doing a camera cuddle, but time with that lens in an exclusive relationship. I put a new lens on my camera and it has to stay there until I become intimate with it. I have to know it inside out, be able to pre-visualise all aspects of it.. And then when I do, the images flow so much more easily. It is easier to get to know a prime lens, which might go some way towards accounting for their popularity.

Read More
articles Len Metcalf articles Len Metcalf

how to find the ultimate camera bag?

Len discusses his frustrations about finding the ultimate camera bag.

Is there such a beast? The ultimate camera bag, does it even exist? They are a bit like tripods, over your photographic lifetime they may multiply in the cupboard. Each purchase adds to the pile. The trouble is that you get seduced with the promise of more space, and as soon as you get that space, you start to fill it up with more camera gear. It keeps growing, and so does the requirements for the camera bag.

I have gone through a fair few in my time, so without recommending the perfect one I do recommend considering a few things.

  1. What do you want to carry in it. Lay your items out, and consider your contents over a period of time. Do you actually use everything you're planning on putting in there. Can you get away with less.

  2. Do you go out on walks with your camera bag? Because if you go bush with one, I recommend you take with you a few things, including: raincoat, jumper, small first aid kit (here in Australia that means at least an elastic roller bandage and your favorite medications), snacks and sufficient water. I like to take a thermos of tea too, and a map, compass and EPIRB or PLB

  3. Comfortable, it has to be comfortable. The best way to test comfort is in the shop, and put 20 kgs in the bag and put it on, and stand there or walk around the shop for an hour. If it is still comfortable then go for it. This is the same strategy we use for choosing bushwalking shoes. Nothing beats the test of time.

  4. Size, the only way to really test the size is to take everything you plan to put in your new camera bag to the shop and put it in there and make sure it fits.. Rearrange the dividers and check to see your camera fits in with all the lenses, batteries, filters and accessories you want to take with you. Look to make sure it is deep enough. That the dividers can be rearranged to fit you gear. Some now have lower dividers for smaller cameras, giving you extra space for your laptop (great idea Think Tank).

  5. Consider weather proofing, and if your bag is going to get soaked regularly you may want to go with a more water resistant or a water proof bag.

Regardless of how well you do all of this, you will still end up with more than one. Each one will suit different trips and equipment. What you take on an animal trip to Africa is different to what you walk along the streets of Sydney with. Different equipment, different requirements, different needs.

Ok, so I am currently considering an f-stop Loka, as I need to be able to carry a first aid kit and a whole lot more safety equipment (and special treats) while running photographic tours.  :)

Which camera bag will take all of this?

Which camera bag will take all of this?

Read More
articles Len Metcalf articles Len Metcalf

getting to know your camera

The original post about camera cuddle. This has also been written up as a weekly exercise.

2090105.jpg

Learning about your camera until it becomes second nature is one of the keys to becoming a better photographer.  There are two tried and true methods of doing this; study and practice. You should do a lot of both. It also helps if you can learn to love your camera. I have written about this before (you can read this here). Reading the manual is an unfortunate place to start as we would love to just pick the camera up and start.  Putting the camera in auto mode and going for it, is a legitimate way to progress. Unfortunately you will still need the manual to even work out which mode this is.  Many manuals are now included only as pdf files. I put mine on my phone, pad and in a folder in my computer / laptop so that I can reference it wherever I am. Years past and for those that have been lucky enough to get a a printed manual with your camera I recommend packing it into your camera bag and having it handy.  It can take years to delve into the full capabilities of modern cameras. You may never even get there.

Some of my students have found the language of these so called manuals to be quiet difficult to understand, which in turn confuses flow charts and settings. This probably is an end product of translating them from their native tongue. Students have reported that third party manuals can overcome this problem. The third party authors task is to write  a manual that helps the photographer understand what is going on with their camera and how to use it. I know that a few of my students have found a deeper understanding from these manuals. For some cameras online tutorials / workshops / courses are available for some common specific models of camera. Make sure you purchase the right one for your camera.

Here is a list of things I think you need to be able to do to take your photography to the next level:

  1. Change the aperture or shutter speed when the camera is in various modes

  2. Select aperture priority or shutter priority & change the aperture or shutter speed when the camera is in both of these modes

  3. Set & change ISO

  4. Set auto ISO upper limit

  5. Change exposure compensation

  6. Change & move the focus point /s

  7. Change the metering mode

  8. Change and understand each mode

  9. Do all of these things without removing your eye from the viewfinder

Now if you don't know how to do these things, go and figure them out and practice, practice and practice.

How to practice?

Camera cuddle (adapted from original exercise by Bruce Barnum)

  1. Go and sit or lay down in your favourite couch / lounge / chair or bed even. And hold your camera and play with it. For the first hour don't take a photograph. Just practice changing settings, over and over and over. Change them with your eyes closed. Change them while your looking through the viewfinder. Change them with the camera under a sheet or towel. Changing the aperture / shutter speed combination, exposure compensation and focus points needs to become second nature.

  2. Take some time to really concentrate on each of your adjustment wheels, knobs, etc. Really feel them, can you tell the difference between them by just feeling or by their location. Get to know which way they turn. The more in touch you are with your camera the better.

  3. Bruce describes this process with a large format camera, and this exercise is extended to having it in its bag, putting up the tripod, assembling the camera and adjusting all movements., inserting the film and taking picture with an empty double dark slide. Then putting it all away again and starting again. He recommends figuring out a system and sticking to that system.

  4. Continue to practice until you can change things without thinking or looking.

  5. After photographing most of my life if I don't use a camera for a few months or years I find I have forgotten all of the little nuances of operating the camera. It is amazing how many times I have forgotten to lock down my camera before shooting because it has been a few months since I last used that particular camera. I still practice, practice and practice. Now days the easiest way to practice is to go and take more photographs, regularly.

Lounge lizard

Now you know your way around a little it is time to start practicing taking photographs.  The easiest way is to limit yourself with your subject so you can concentrate on your camera and the picture taking process.

  1. For an hour take photographs from your lounge. Take some with wide open apertures, closed apertures, fast shutter speeds and slow shutter speeds. Use exposure compensation to get your exposure just right. Now go and have a look through your images and find a few good ones.. What settings did you have them on. Which images are blurry - check the shutter speed and the focal length of your lens. Make some notes / make generalisations / rules even (ie I can hand hold my 50mm lens at 1/30 second and still get sharp pictures)

  2. Repeat this exercise on another day.. and even another one

  3. If you must try a different chair in a different room in the house and repeat.

2090105.jpg

Len Metcalf with his Techinica III circa 1950

Read More
articles Len Metcalf articles Len Metcalf

Photographic workflow

Len discusses his photographic work flow, from capture all the way through to print...

BKing fern, Glow worm tunnel canyon, The Greater Blue Mountains World Heritage Area © Leonard Metcalf 200l2

My workflow has changed considerably over the years. It started with film and large format cameras. I learnt to hand print both my colour and black & white work. I printed on rc papers, such as Ilford rc Iflord Cibachrome, Fuji R4 and fibre based papers like Agfa. In the late nineties I moved to digital printing, scanning my films with drum scanners, processing in Photoshop and outputting with light jets onto traditional photographic papers. Some were Ilford Ifochrome (the newer rebranded Cibachrome), Fuji Crystal Archive and Kodak digital papers. When Inkjets came of age I switched to pigment on cotton. My journey back to cotton papers had started. My preferred printers were Epson printing on Innova smooth cotton museum quality rag paper. This was one of the most popular printing papers with us fine artists here in Australia, but unfortunately importing has stopped. Printing on matte papers is much more like drawing, they are soft and expressive. Now I am printing on Centuron Silk and using Ilford pear as my proofing paper. These newer plastic papers look like traditional photographs, yet lack the tactile sense that my prints on cotton had.

In amongst all of this I returned to my roots as a traditional printmaker. I was trained as a fine art lithographer at art school, and had been etching on the side since starting. Lithography was my minor while photography was my major. I would have pursued etching more vigorously if I hadn't disliked my teacher so much. Mind you the subtly of drawing on a lithographic stone is sublime. Such an experience, I am so lucky to have been able to experience it and produce some beautiful editions in the process.

Delving into photogravure was an easy step. Starting with polymer plates (solar plates) and dabbling in traditional copper plate. On my agenda is setting up a printmaking studio with an intaglio press and a non toxic work flow. It has been rather disheartening to find out about the demise of traditional stone lithography in Australia and around the world. Not surprising really considering how many practitioners died of leukaemia / cancer due to the highly toxic chemicals. I lost my teacher to leukaemia while she taught us at art school. In one semester she went from what appeared to be strong and healthy to a thin hollow shell to passing.. So so quick. So so sad.

Now my workflow is simpler. Usually a digital capture, though sometimes a film capture then scan to digital. I love to work with a small mirror less camera with a digital viewfinder. It is set to black and white (sepia actually as I find it easier on my eyes) and shoot raw. I can see and preview what I am doing in black and white yet still have all of the colour information at hand to utilise when processing. I love to use a cheaper consumer aimed camera rather than a high end professional model and spend my money on superior prime lenses. My legs make better zooms and changing lenses is way sharper than most zooms. Besides I know my lenses enough that I can I don't have to think about their perspective before I bring them up to my eye.

On import into Lightroom I use my own presets. I have a few, mostly with subtle changes to micro / mid tone contrast and overall sharpening, applying an orange filter in my own beautiful curve and the application of my sepia tones. Later, I can play with the colour conversion. Sometimes the image gets tweaked in Nik Silver efx; structure controls are superior to photoshop or Lightroom, and the vignette and edge darkening is simplified.

I then print it out on my inkjet printer. But I long to be able to hand print them on my own intaglio press, getting my hands covered in ink and hand pulling each print. One day soon I am sure.

Read More