

how to find the ultimate camera bag?
Len discusses his frustrations about finding the ultimate camera bag.
Is there such a beast? The ultimate camera bag, does it even exist? They are a bit like tripods, over your photographic lifetime they may multiply in the cupboard. Each purchase adds to the pile. The trouble is that you get seduced with the promise of more space, and as soon as you get that space, you start to fill it up with more camera gear. It keeps growing, and so does the requirements for the camera bag.
I have gone through a fair few in my time, so without recommending the perfect one I do recommend considering a few things.
What do you want to carry in it. Lay your items out, and consider your contents over a period of time. Do you actually use everything you're planning on putting in there. Can you get away with less.
Do you go out on walks with your camera bag? Because if you go bush with one, I recommend you take with you a few things, including: raincoat, jumper, small first aid kit (here in Australia that means at least an elastic roller bandage and your favorite medications), snacks and sufficient water. I like to take a thermos of tea too, and a map, compass and EPIRB or PLB
Comfortable, it has to be comfortable. The best way to test comfort is in the shop, and put 20 kgs in the bag and put it on, and stand there or walk around the shop for an hour. If it is still comfortable then go for it. This is the same strategy we use for choosing bushwalking shoes. Nothing beats the test of time.
Size, the only way to really test the size is to take everything you plan to put in your new camera bag to the shop and put it in there and make sure it fits.. Rearrange the dividers and check to see your camera fits in with all the lenses, batteries, filters and accessories you want to take with you. Look to make sure it is deep enough. That the dividers can be rearranged to fit you gear. Some now have lower dividers for smaller cameras, giving you extra space for your laptop (great idea Think Tank).
Consider weather proofing, and if your bag is going to get soaked regularly you may want to go with a more water resistant or a water proof bag.
Regardless of how well you do all of this, you will still end up with more than one. Each one will suit different trips and equipment. What you take on an animal trip to Africa is different to what you walk along the streets of Sydney with. Different equipment, different requirements, different needs.
Ok, so I am currently considering an f-stop Loka, as I need to be able to carry a first aid kit and a whole lot more safety equipment (and special treats) while running photographic tours. :)

Which camera bag will take all of this?
Apertures, what do you need to know?
Understanding apertures is important... just as important as understanding shutter speeds. The web and books are full of information about apertures so I have no intention of repeating what all ready has been done before. So here you will find a couple of links and a list of things you should know or go and find out about. Then some exercises that you should do.
What I recommend you should know about apertures:
what is depth of field?
what aperture gives you a shallow depth of field
what aperture gives you a deep depth of field
when using a small aperture (large f number) what is happening to the amount of light coming into your lens
when using a large aperture (small f number) what is happening to the amount of light coming into your lens
how does depth of field relate to your different focal length lenses? which lens has the greatest depth of field & which one has the least?
what aperture gives you the sharpest photographs for each of your lenses (if you have zooms this changes with the amount of zoom)
what does bokeh mean?
which of your lenses has the most beautiful bokeh?
in the newspaper press film photographer days the saying to the photographer was "f8 and be there", why do you think they said this?
what is the "sunny 16 rule" - what does that tell you?
what is diffraction? can you see it on any of your photographs? what f stop does it start?
what is the hyperfocal distance? how do you use hyperfocal distance in your photography? how do you calculate hyperfocal distances?
for advanced photographers: what is the circle of confusion?
Reading
Depth of field calculators - lots and lots of good ones
Exercises
photograph an object to create subject isolation with a blurry background
photograph a scene to maximise depth of field so that everything in the photograph is in focus
align three similar objects on a table in a line so that the objects are at different distances from the camera. Photograph lots and lots of photographs with your camera on a tripod in a fixed position. Try focusing on each of the objects and changing the f stops. Try using different focal length lenses
use hyperfocal distance to calculate what areas are going to be in focus in a photograph and then take a photograph where all of the objects are in focus
find some approximate rules for hyperfocal focusing - why might these lead you astray when using them
photograph a still life with all of the objects in the still life are on the same plane that is perpendicular to the path of the light into the camera. use your sharpest lens and your sharpest aperture

Rose - illustrating subject isolation utilising aperture © Len Metcalf 2013

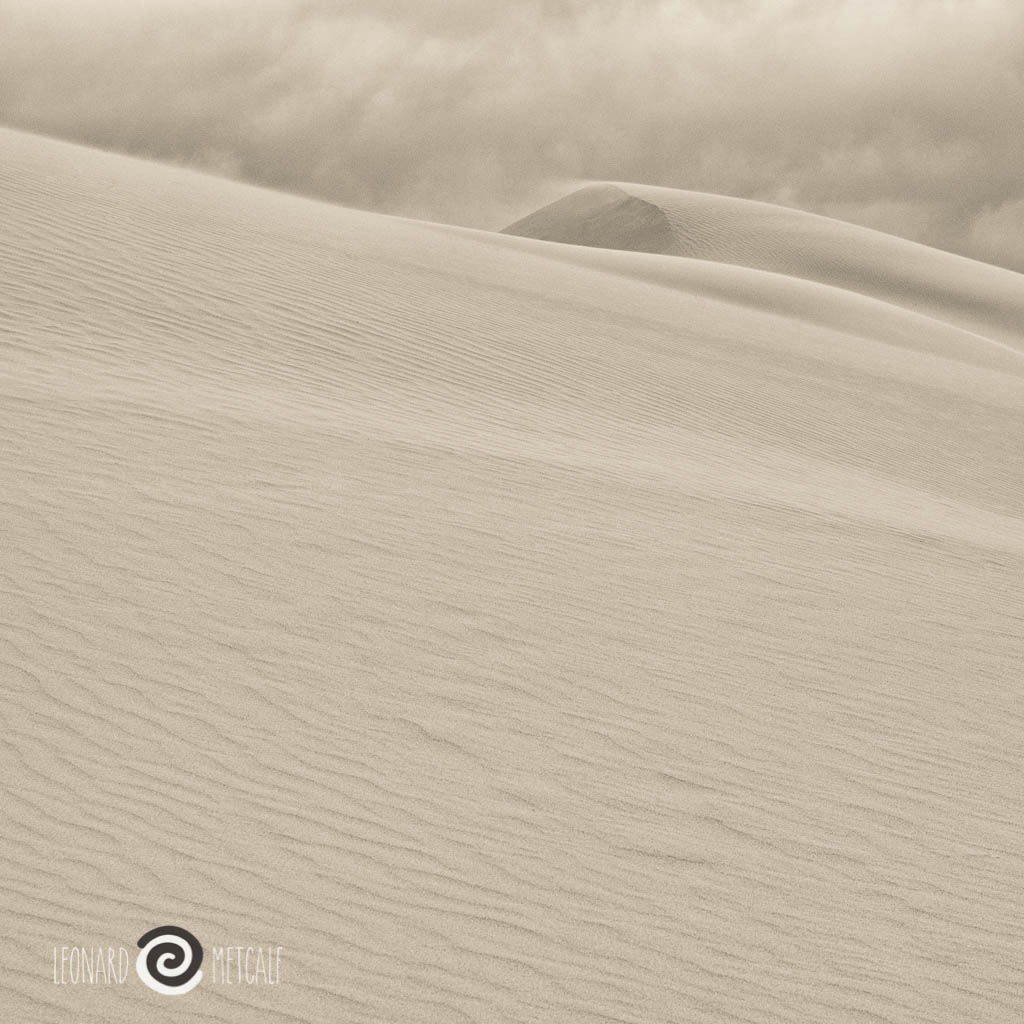
Vigars Well Lake Mungo, illustrating the use of depth of field through the use of appropriate aperture and hyperfocal focusing. Where would you put the focus point in this photograph? © Len Metcalf 2013
Shutter speeds
How well do you know your shutter speeds. Here are some exercises and questions to answer.

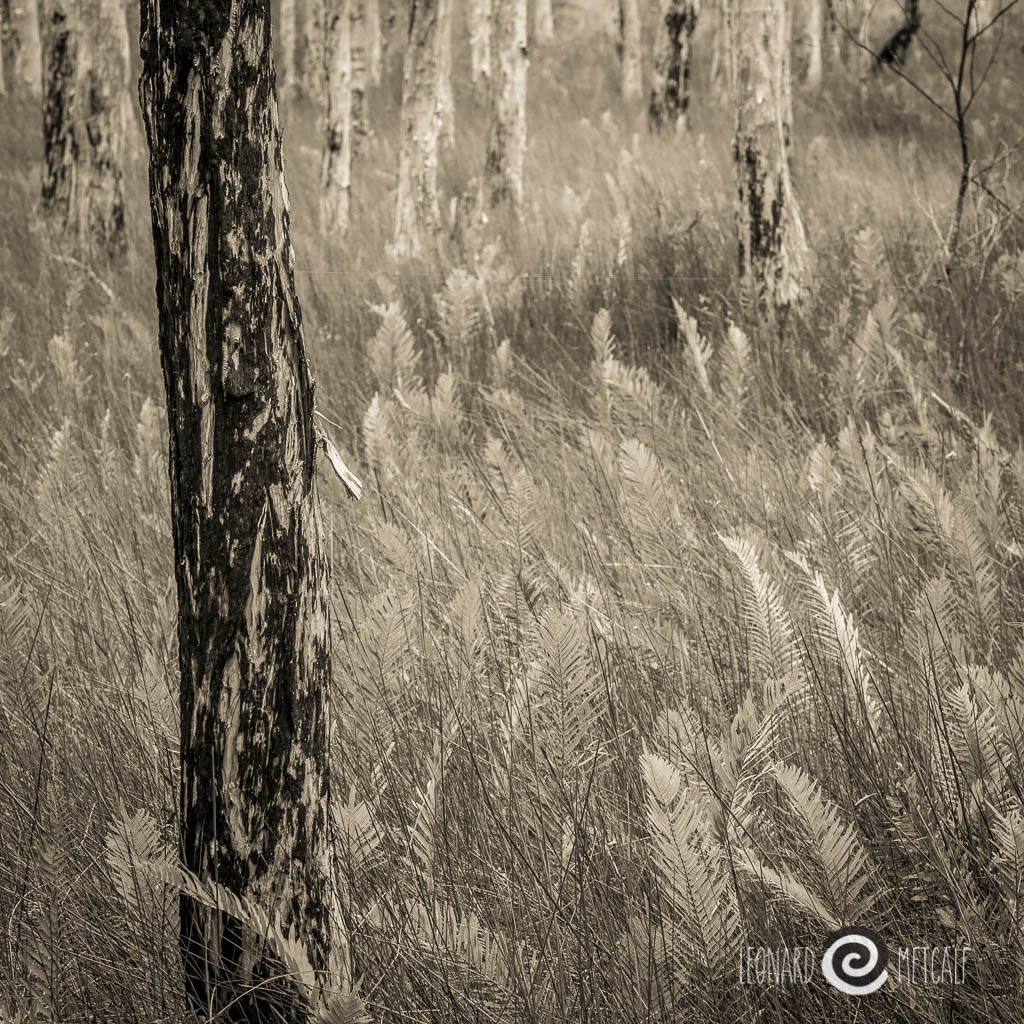
Paper bark and fishbone ferns, Myall Lakes National Park, Australia © Leonard Metcalf 2014
Do you know your shutter speeds well enough? To help with this question, consider the following with three lenses (24mm, 50mm 100mm full frame equivalents on your camera)
What shutter speed:
can you comfortably and reliably hand hold
can you comfortably and reliably hand hold after exercise
can you hold with extra support (i.e. a mono pod or leaning against a vehicle or tree)
freezes a person walking
freezes someone running
freezes a car at 50 km / per hour
stops water falling
blurs water in a waterfall
is good for blurring photographs
freezes grass blowing in a gentle breeze
do you need to lock the mirror up when the camera is on a tripod
The answers for these images varies between focal lengths of your lens in some instances and not for others.
The key one is hand hold-ability... You need to clearly know when to be increasing the ISO or changing the aperture so that you are getting sharp photographs.
Can you check your shutter speed in the viewfinder. Do you remember to check it each time you take a photograph?
Working out your hand hold shutter speed is dependent on the lens, your technique and the megapixel count of your camera. The best way to determine this is to test different shutter speeds and physically check the resulting images at 50%. Once you work out what shutter speed you can hand hold for each of your main lenses write it down in your notebook and keep this information with in your camera bag.

light painting the figure
Painting in figures with a torch during long exposures is one of Len's favorite techniques. Here he describes how he does it. Go on try it tonight.
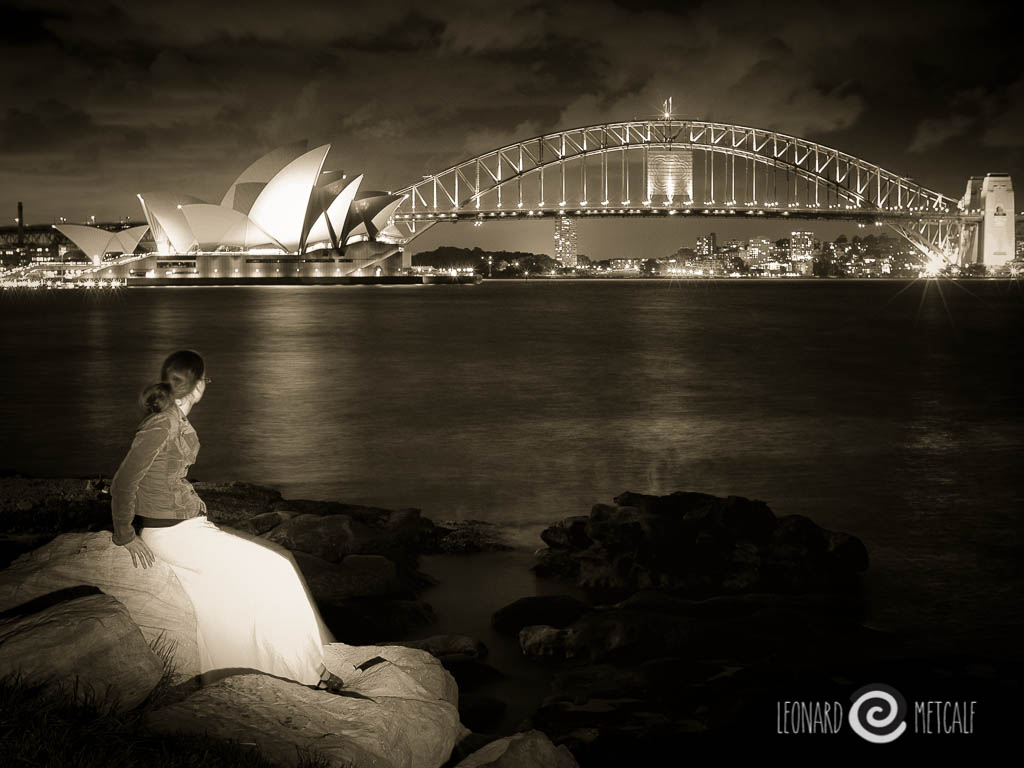
Our last photograph before finishing. The light had almost gone, so I added some more with a torch, as described bellow, painting around her so that it was soft and not directional. From our book ‘ Our love affair with trees.’ that I am co authoring with Jodi Rose.
Lightpainting the nude figure is fun and gives us the most beautiful results. The light can be shaped in ways that no other technique can replicate. With minimal equipment and a little practice stunning results can quickly be achieved. Equipment considerations
Camera that you can set on 60 second exposures or on bulb
Sturdy tripod
Torch - the choice of torch is important. Recently I have settled on LED torches and have fallen in love with a LED Lenser (P6)
Willing model & suitable model release
Before running out the door with all of these things I do recommend having a quick look at the weather and the outdoor temperature. Here in Sydney it is really only warm enough to do this in the summer months (Nov - March).
The other thing to consider is the location. Obviously somewhere quiet without onlookers is a serious consideration. The other thing to look for is solid objects to lean the model against. Have a look in the following photograph. Her head is propped against the tree as is most of her body. This keeps her still for the minute exposure. I do a verbal count down so that the model knows when to start being still and so they can hold their breath for the whole exposure. I also tell them when it is over so they can relax & breath again.
Before we get to taking the image the first thing you need to consider is the exposure. I like to use a sixty second exposure as this gives me plenty of time to work with the torch. I always set my ISO as low as possible, my current camera only goes to 200 ISO so that is what I use. The next step is to play with the aperture to get enough of an exposure in your background. I have been finding f 5.6 seems to work for me and I use that as a starting point. I put my camera in manual and then take an exposure (60 seconds @ f5.6) and then have a look.
If your camera at this point seems to be taking a long time before you can view the image this is because you have long exposure noise reduction on and your camera is taking a second exposure of the blackness (with its shutter closed) and subtracting the hot (white) pixels from the original photograph. This is called a dark frame subtraction. Despite this being inconvenient it is a good thing as it reduces noise in your final photograph so I recommend leaving it on. Most cameras have this default set to start on exposures after 1 second.
While determining the exposure I need to consider the final look. I like my night photographs to look like they were taken at night, so I tend to under expose them so there is a lot of black so they look quiet dark. This is my personal preference. If you want a darker image stop down your lens to f 8 or f 16. If you want a brighter photograph open up your lens to f4 or f2.8. If f5.6 is your widest aperture then you can always increase your ISO. Try doubling it.
The wind blows gently and moves the fabric to soften this part of the photograph.
Now we are ready for our model. To keep your model warm keep them clothed and start working on your composition, the models pose and light painting. I figure out what it will look like before you do a nude version. Sometimes these test photographs are so good that you may not go any further. The following photograph is an example of one of these tests.
Mea Culpa & Sydney, I love this image even though It was a test / practice shot and it has now made its way into my catalogue © Leonard Metcalf 2011
Now you need to figure out your torch exposure. This is simpler than you would imagine. I start with a 30 second exposure. I walk around behind the camera painting my subject with light from about ten metres. I work evenly on both sides of my camera (left and right) and vertically as well. By doing this I get a very soft light that wraps around the figure.
The last 30 seconds of my exposure I use to add extra light to the foreground and to any of the other objects in the composition (like the tree in the first photograph in this article.
The rules:
once you get your background exposure correct don't change it
if the figure is too bright, reduce the amount of light on it - you do this by reducing how long you shine your torch on the model
if the figure is too dark, increase the amount of light on it - shine the light on the model for longer
if you move closer to the subject with your torch you are increasing the amount of light on the subject
if you move further away from the subject with your torch you are decreasing the amount of light on the subject
initially stay the same distance away from your subjects to remove this variable
practice, practice, practice - "Practice does not make perfect. Perfect practice makes perfect" - Vince Lombardi ;)
It is inevitable that your subject will move during this process. It is part of the process and needs to be embraced. Have a really close look at my examples and you will see the delightful movement in the figures. I think they really add to the technique.
Our yellow wiggle poses with a giant fig. Shorter exposures mean their is less movement with the subject.
Light painting is a slow and laborious exercise that creates amazing results. I have found that in a three hour session we might only create 12 images and only one or two worthwhile ones. Despite this it is well worth the effort. Keep an eye on your model and keep them warm, with hot drinks & sugar and rug them up between images. If they get too cold it is time to go home.
Diane Arbus
Diane Arbus is interesting to study as she was a master of putting herself into her portraits...

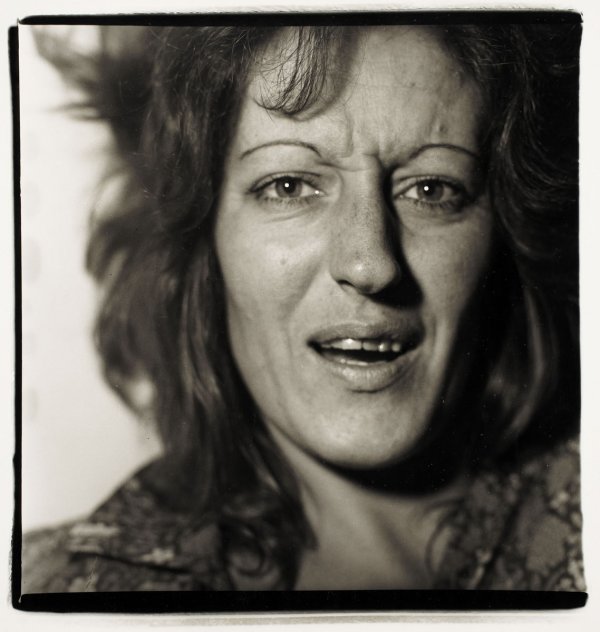
Diane Arbus's photographs are more about her inner psychological workings than her subjects. She reportedly manipulated the subjects until she found the look she was looking for. The account by Germaine Greer is telling of a deeper and more wide spread approach that she used. She would put her feelings into the images. She would manipulate, intimidate and coerce the subjects until she got what she wanted. Perhaps not in all her photographs, but she clearly used this technique on a large number of her subjects. For a detailed account of her inner workings I would recommend the book Emergency in Slow Motion: The inner life of Diane Arbus by William Schultz
In his book Schultz refers to this particular shoot with Germaine Greer and in her own words we can hear her side of the shoot.
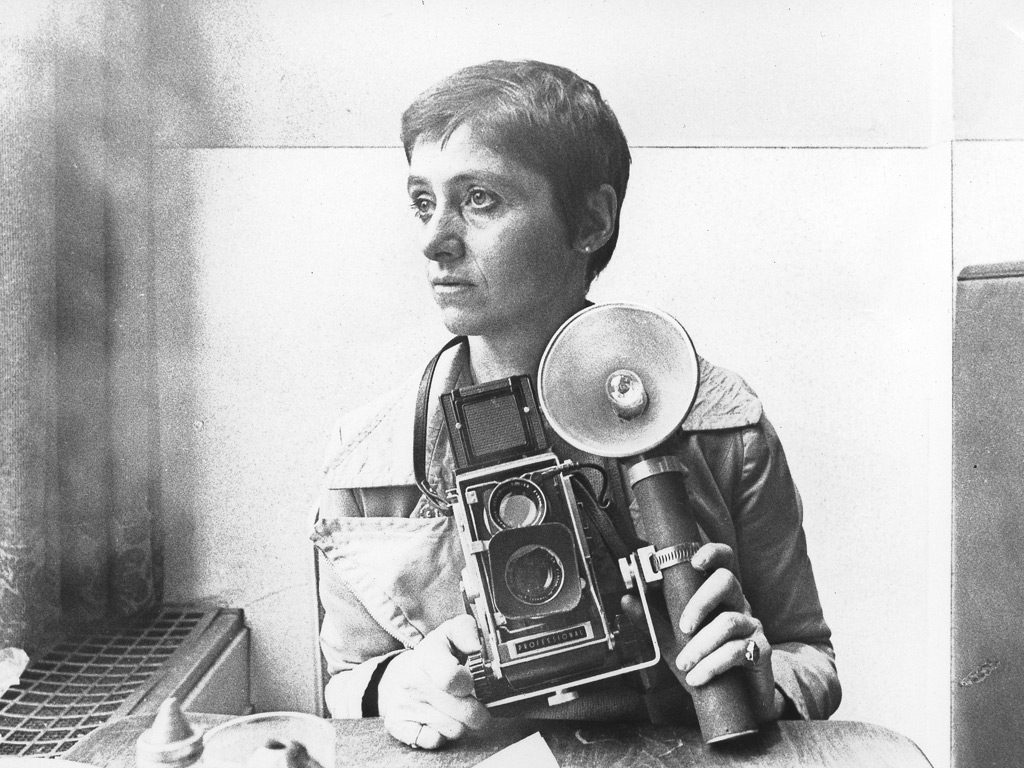
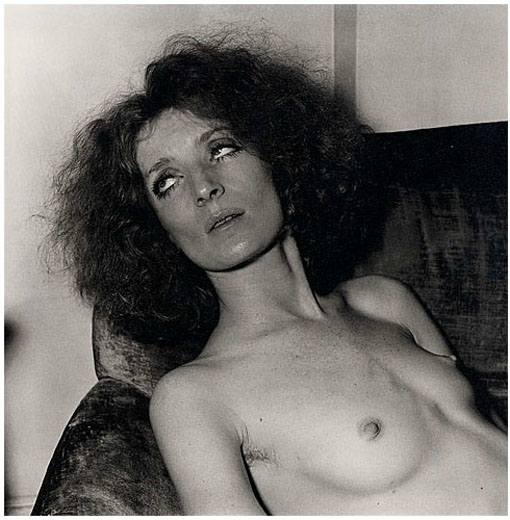
"She set up no lights, just pulled out her Rolleiflex, which was half as big as she was, checked the aperture and the exposure, and tested the flash. Then she asked me to lie on the bed, flat on my back on the shabby counterpane. I did as I was told. Clutching the camera she climbed on to the bed and straddled me, moving up until she was kneeling with a knee on both sides of my chest. She held the Rolleiflex at waist height with the lens right in my face. She bent her head to look through the viewfinder on top of the camera, and waited.
In her viewfinder I must have looked like a guppy or like one of the unfortunate babies into whose faces Arbus used to poke her lens so that their snotty tear-stained features filled her picture frame (eg, A Child Crying, NJ, 1967). I knew that at that distance anybody's face would have more pores than features. I was wearing no make-up and hadn't even had time to wash my face or comb my hair.
Pinned on the bed by her small body with the big camera in my face, I felt my claustrophobia kick in; my heart-rate accelerated and I began to wheeze. I understood that as soon as I exhibited any signs of distress, she would have her picture. She would have got behind the public persona of Life cover-girl Germaine Greer, the "sexy feminist that men like". I concentrated on breathing deeply and slowly, and keeping my face blank. If it was humanly possible I would stop my very pupils from dilating. Immobilised between her knees I denied her, for hour after hour. Arbus waited me out. Nothing would happen for minutes on end, until I sighed, or frowned, and then the flash would pop. After an eternity she climbed off me, put the camera back in her bag and buggered off."
Germaine Greer - The Guardian 8th October 2005 - Read the full article by Germaine Greer here
In portraiture do you think it is ok to put your own agenda into the image of your subjects. If there is a line between manipulating the subject and not, where is it for you?
Germaine Greer
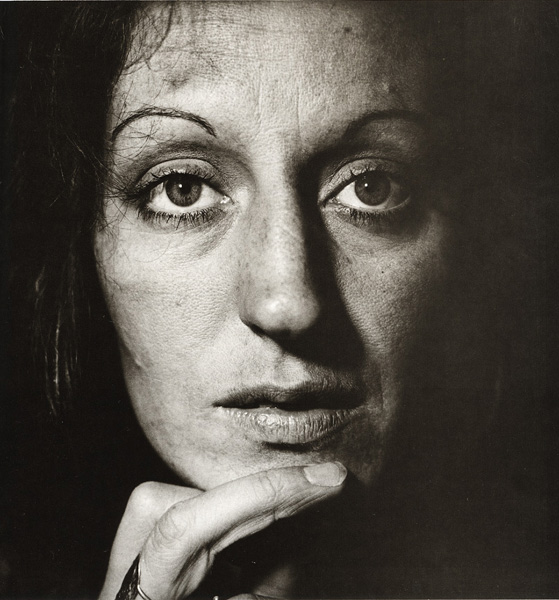
Germain Greer by Diane Arbus
Germaine Greer by Diane Arbus

Psychobiography of Diane Arbus
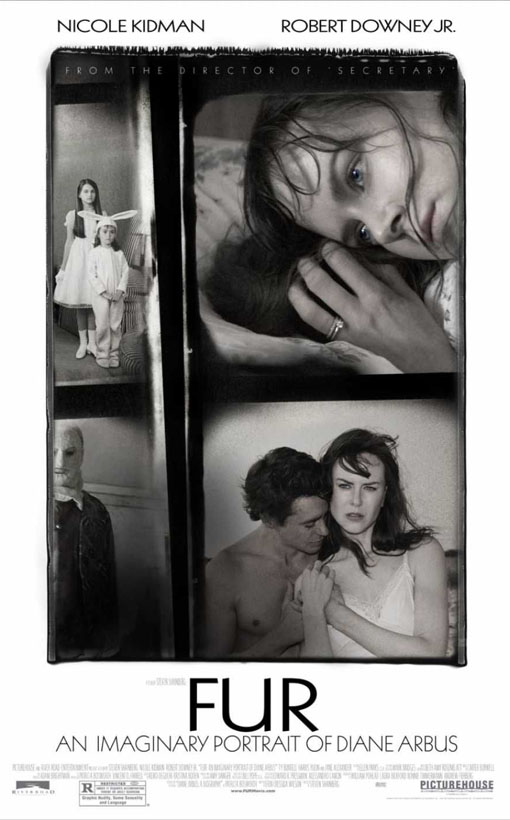
Fur

getting to know your camera
The original post about camera cuddle. This has also been written up as a weekly exercise.
Learning about your camera until it becomes second nature is one of the keys to becoming a better photographer. There are two tried and true methods of doing this; study and practice. You should do a lot of both. It also helps if you can learn to love your camera. I have written about this before (you can read this here). Reading the manual is an unfortunate place to start as we would love to just pick the camera up and start. Putting the camera in auto mode and going for it, is a legitimate way to progress. Unfortunately you will still need the manual to even work out which mode this is. Many manuals are now included only as pdf files. I put mine on my phone, pad and in a folder in my computer / laptop so that I can reference it wherever I am. Years past and for those that have been lucky enough to get a a printed manual with your camera I recommend packing it into your camera bag and having it handy. It can take years to delve into the full capabilities of modern cameras. You may never even get there.
Some of my students have found the language of these so called manuals to be quiet difficult to understand, which in turn confuses flow charts and settings. This probably is an end product of translating them from their native tongue. Students have reported that third party manuals can overcome this problem. The third party authors task is to write a manual that helps the photographer understand what is going on with their camera and how to use it. I know that a few of my students have found a deeper understanding from these manuals. For some cameras online tutorials / workshops / courses are available for some common specific models of camera. Make sure you purchase the right one for your camera.
Here is a list of things I think you need to be able to do to take your photography to the next level:
Change the aperture or shutter speed when the camera is in various modes
Select aperture priority or shutter priority & change the aperture or shutter speed when the camera is in both of these modes
Set & change ISO
Set auto ISO upper limit
Change exposure compensation
Change & move the focus point /s
Change the metering mode
Change and understand each mode
Do all of these things without removing your eye from the viewfinder
Now if you don't know how to do these things, go and figure them out and practice, practice and practice.
How to practice?
Camera cuddle (adapted from original exercise by Bruce Barnum)
Go and sit or lay down in your favourite couch / lounge / chair or bed even. And hold your camera and play with it. For the first hour don't take a photograph. Just practice changing settings, over and over and over. Change them with your eyes closed. Change them while your looking through the viewfinder. Change them with the camera under a sheet or towel. Changing the aperture / shutter speed combination, exposure compensation and focus points needs to become second nature.
Take some time to really concentrate on each of your adjustment wheels, knobs, etc. Really feel them, can you tell the difference between them by just feeling or by their location. Get to know which way they turn. The more in touch you are with your camera the better.
Bruce describes this process with a large format camera, and this exercise is extended to having it in its bag, putting up the tripod, assembling the camera and adjusting all movements., inserting the film and taking picture with an empty double dark slide. Then putting it all away again and starting again. He recommends figuring out a system and sticking to that system.
Continue to practice until you can change things without thinking or looking.
After photographing most of my life if I don't use a camera for a few months or years I find I have forgotten all of the little nuances of operating the camera. It is amazing how many times I have forgotten to lock down my camera before shooting because it has been a few months since I last used that particular camera. I still practice, practice and practice. Now days the easiest way to practice is to go and take more photographs, regularly.
Lounge lizard
Now you know your way around a little it is time to start practicing taking photographs. The easiest way is to limit yourself with your subject so you can concentrate on your camera and the picture taking process.
For an hour take photographs from your lounge. Take some with wide open apertures, closed apertures, fast shutter speeds and slow shutter speeds. Use exposure compensation to get your exposure just right. Now go and have a look through your images and find a few good ones.. What settings did you have them on. Which images are blurry - check the shutter speed and the focal length of your lens. Make some notes / make generalisations / rules even (ie I can hand hold my 50mm lens at 1/30 second and still get sharp pictures)
Repeat this exercise on another day.. and even another one
If you must try a different chair in a different room in the house and repeat.

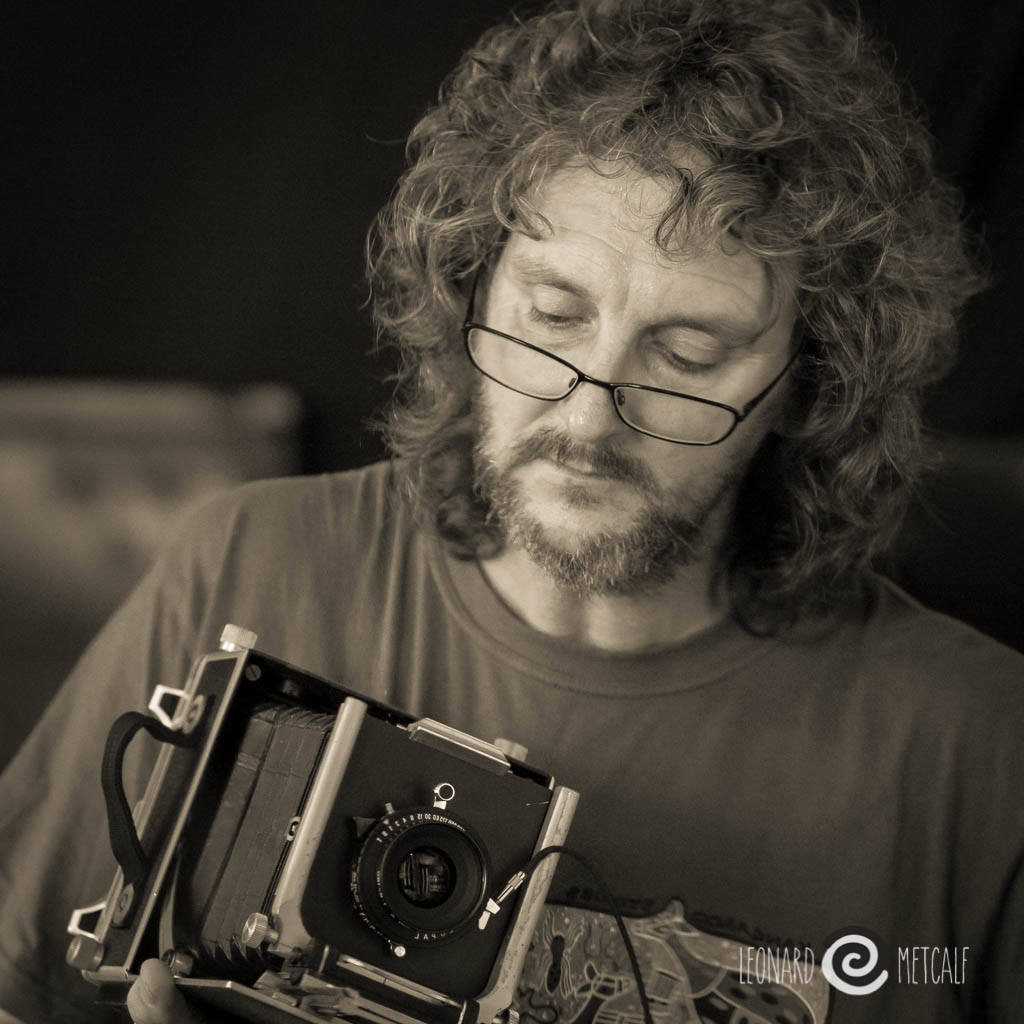
Len Metcalf with his Techinica III circa 1950

Photographic workflow
Len discusses his photographic work flow, from capture all the way through to print...
BKing fern, Glow worm tunnel canyon, The Greater Blue Mountains World Heritage Area © Leonard Metcalf 200l2
My workflow has changed considerably over the years. It started with film and large format cameras. I learnt to hand print both my colour and black & white work. I printed on rc papers, such as Ilford rc Iflord Cibachrome, Fuji R4 and fibre based papers like Agfa. In the late nineties I moved to digital printing, scanning my films with drum scanners, processing in Photoshop and outputting with light jets onto traditional photographic papers. Some were Ilford Ifochrome (the newer rebranded Cibachrome), Fuji Crystal Archive and Kodak digital papers. When Inkjets came of age I switched to pigment on cotton. My journey back to cotton papers had started. My preferred printers were Epson printing on Innova smooth cotton museum quality rag paper. This was one of the most popular printing papers with us fine artists here in Australia, but unfortunately importing has stopped. Printing on matte papers is much more like drawing, they are soft and expressive. Now I am printing on Centuron Silk and using Ilford pear as my proofing paper. These newer plastic papers look like traditional photographs, yet lack the tactile sense that my prints on cotton had.
In amongst all of this I returned to my roots as a traditional printmaker. I was trained as a fine art lithographer at art school, and had been etching on the side since starting. Lithography was my minor while photography was my major. I would have pursued etching more vigorously if I hadn't disliked my teacher so much. Mind you the subtly of drawing on a lithographic stone is sublime. Such an experience, I am so lucky to have been able to experience it and produce some beautiful editions in the process.
Delving into photogravure was an easy step. Starting with polymer plates (solar plates) and dabbling in traditional copper plate. On my agenda is setting up a printmaking studio with an intaglio press and a non toxic work flow. It has been rather disheartening to find out about the demise of traditional stone lithography in Australia and around the world. Not surprising really considering how many practitioners died of leukaemia / cancer due to the highly toxic chemicals. I lost my teacher to leukaemia while she taught us at art school. In one semester she went from what appeared to be strong and healthy to a thin hollow shell to passing.. So so quick. So so sad.
Now my workflow is simpler. Usually a digital capture, though sometimes a film capture then scan to digital. I love to work with a small mirror less camera with a digital viewfinder. It is set to black and white (sepia actually as I find it easier on my eyes) and shoot raw. I can see and preview what I am doing in black and white yet still have all of the colour information at hand to utilise when processing. I love to use a cheaper consumer aimed camera rather than a high end professional model and spend my money on superior prime lenses. My legs make better zooms and changing lenses is way sharper than most zooms. Besides I know my lenses enough that I can I don't have to think about their perspective before I bring them up to my eye.
On import into Lightroom I use my own presets. I have a few, mostly with subtle changes to micro / mid tone contrast and overall sharpening, applying an orange filter in my own beautiful curve and the application of my sepia tones. Later, I can play with the colour conversion. Sometimes the image gets tweaked in Nik Silver efx; structure controls are superior to photoshop or Lightroom, and the vignette and edge darkening is simplified.
I then print it out on my inkjet printer. But I long to be able to hand print them on my own intaglio press, getting my hands covered in ink and hand pulling each print. One day soon I am sure.